Pregnancy Favorites


Hi there! Wow, it’s been awhile since I’ve posted. Do I have an excuse? Well let’s see – I got married, bought a house, got a puppy, existed in the middle of a global pandemic, and now…I’m pregnant!! All of this has led me to have less time (and money) to spend on beauty products, and write about them, but I’m back, baby.

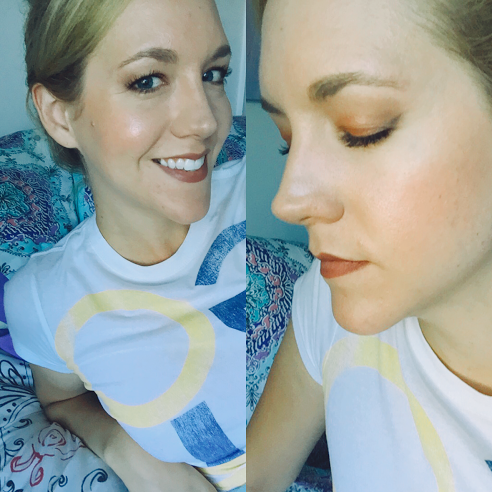
This will be the first child for me and my husband and we are so, so excited to welcome her to the world in October. Yes – I’m having a girl! Let’s hope she likes nail polish and all things beauty product related because my God, will she have been born into the right household. And if there’s ever a time to step up the self care and do what you can to feel your best, I’d argue it’s when you are creating another whole human being and carrying her around in your belly all day. So with that, let’s get to the products (and a few other fun things) I’ve been loving during this pregnancy:

20 weeks along and a spotlight-stealing appearance by my pupper, Rizzo

Mother’s Friend

Alright, hear me out. The first product is straight out of the 1970’s, and the packaging proves it.

Photo credit: pinterest.com

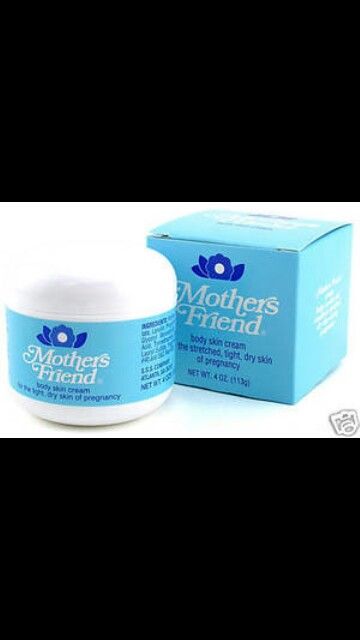
When I first told my Mom I was pregnant, she insisted on tracking down some Mother’s Friend Stretch Mark Cream and sending it to me. Back in the 1970s, she and all of the women she knew used this cream during pregnancy and swear that it’s the sole reason they did not get any stretchmarks. I figured I’d give it a shot – and at almost 6 months along, there is not one stretch mark on my belly (knock on wood!). I apply this to my damp skin each night after a shower and my only real complaint is the scent – it’s…unique. Definitely very perfume-y but it weirdly goes along well with the whole 70’s vibe.

RoseHIP Seed Oil

Photo credit: Amazon.com

I’m a big fan of mixing in a few drops of this organic Rosehip Seed Oil in with the Mother’s Friend, and also use it a bunch of other ways. It’s a great night time moisturizer, I’ll throw some in my hair for an hour before washing for a deep conditioning treatment and I’ll rub some on my nails from time to time. It’s safe for pregnancy and adds a little bit of an extra luxurious step to my routine.

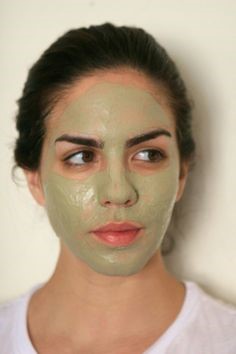
Freeman’s Glacier Water + Pink Peony Gel Cream Mask

Photo credit: ulta.com

In my first trimester (specifically weeks 6-12) I felt ROUGH. Terrible. Not good. I was nauseous 24/7, beyond tired and struggling to drink enough water. How can water, of all things, taste gross? Oh it’s just another one of the magical facets of pregnancy.

All of this led to my skin being super dried out and dull looking. Luckily I stumbled upon this amazing leave-on mask during a quick trip to Five Below. I’m a huge fan of all of the Freeman Beauty masks I’ve tried, and decided to give this one a go. It smells amazing, and when I leave it on overnight I wake up with incredibly soft and glowing skin. It’s inexpensive and you only need a pea-sized amount so it will last a long, long time. Highly recommend it if you’re a mask junkie like me.

R+co Waterfall moisture + shine Lotion

Photo credit: amazon.com

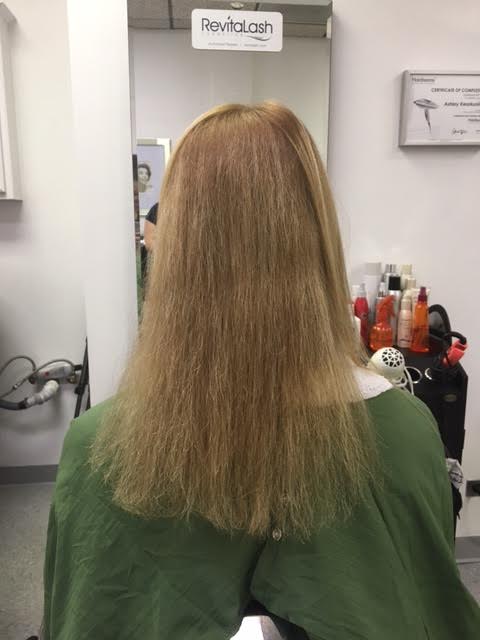
On the “dry as a popcorn fart” note, let’s talk about hair. First trimester my hair was an absolute disaster. I had not had a cut or color in 11 months and the ends could’ve been used as a very durable, stiff broom if necessary.

Thankfully, I was able to get a much needed cut and color in the second trimester and my lovely stylist, Elise, recommended the R+Co waterfall lotion. The smell is divine, and although it is pricey, a tiny bit goes a long way and leaves my hair much softer, shinier and less frizzy. I like to apply a bit before blow drying or using other heat tools, and then a dab on the ends throughout the next couple days to keep my style looking fresh.

non-beauty favorites

Now let’s talk about some other things I’ve been loving while pregnant. First, FOOD!!

Look at these beauties from Joe Donut

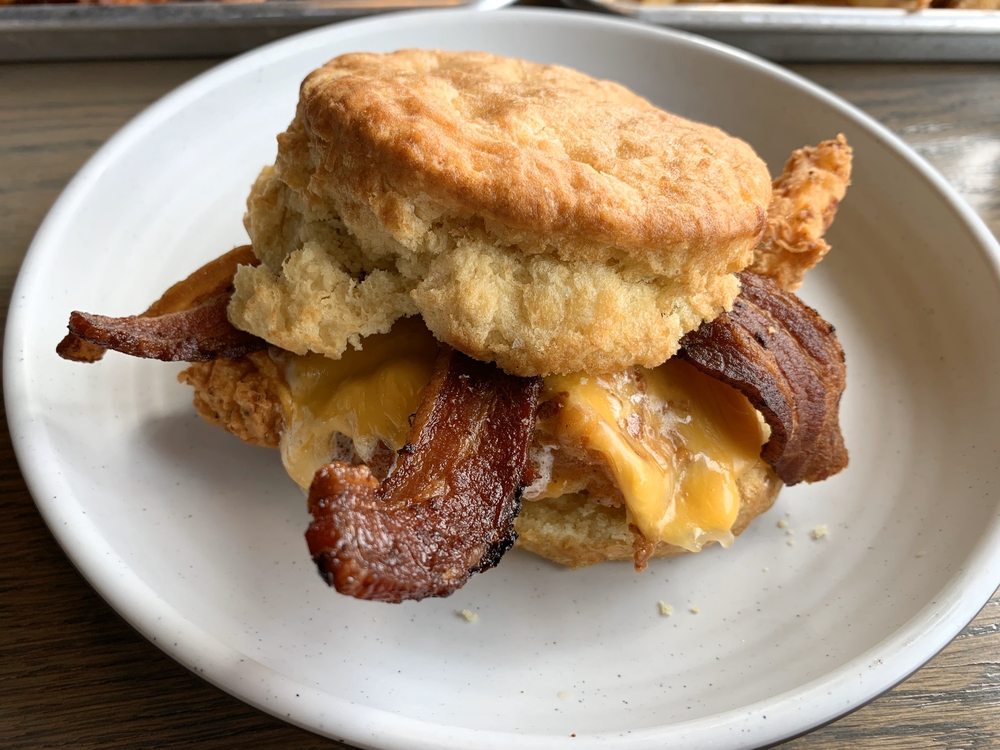
Pre-pregnancy, I never really had a sweet tooth. I was more of a salty, crunch kind of gal. Give me a bag of Doritos or Cheetos and I’m happy. But pregnant? I want donuts. All of them. Glazed, sprinkles, chocolate, covered in Oreos or Lucky Charms…give them all to me. God bless my wonderful husband for driving to Joe Donut every weekend to pick up my beloved confections. If you’re in the Chicago area, hit up one of their 3 locations. I can’t recommend their donuts and really, all of their food, highly enough. Their homemade hashbrowns are out of this world and I’ve also inhaled quite a few of their breakfast sandwiches. I mean, look at this.

Photo credit: yelp

Haagen Dazs Caramel Cone Ice Cream

Let’s continue the topic of other extremely healthy foods I’ve been loving (I swear I do eat vegetables, too!) and talk about the heaven in a cup that is the Haagen Dazs Caramel Cone Ice Cream.

Photo credit: haagendazs.us

This is the perfect ice cream, in my humble opinion. The base is a velvety smooth caramel ice cream – but it’s not too overwhelmingly caramel tasting, you know what I mean? – with chunks of chocolate-dipped waffle cone mixed throughout. Good Lord. Just reading that made your mouth water, didn’t it. If you’re a caramel or waffle cone fan, definitely throw this in your cart the next time you’re at the store. You won’t regret it.

cleaning, organizing and decorating

The nesting urge has hit me full force in the last couple of weeks. I’ve been cleaning, decluttering, organizing and decorating like a mad woman. It just feels so good! Hormones are a wild thing, man.

I’ve been making weekend trips to the Dollar Tree to stock up on cleaning products and organization goodies – baskets and such. And I’ve also been watching a ton of decorating and cleaning YouTube videos. My favorite channel at the moment is Alexandra Beuter. I love her interior decor and “clean with me” videos. Even if I’m just on the couch watching her clean while I cram another spoonful of that Haagen Dazs into my mouth, she makes me feel like I’m being productive by watching her get her house together.

PharMeDoc u-shape Pregnancy Pillow

Photo credit: Amazon

And last but certainly not least, we have the PharMeDoc U-Shape Full Body Pregnancy Pillow. I don’t know how any pregnant woman sleeps without one of these. The washable cover material is soooo soft, and the pillow can be moved in tons of ways to keep my hips, belly and whole body feeling comfy. My dog and husband are also huge fans of this pillow and I catch them cuddling up to it during the night. Can’t blame them, though. I bought this when I was at the beginning of my second trimester and I highly recommend buying it then instead of waiting until you’re tossing and turning all night and trying to prop your belly up with regular pillows.

That’s all for now! I’ll come back and update you with my third trimester favorites, and a “What’s in my hospital bag” rundown. In the meantime – Let me know what your pregnancy favs are!

Review: Tape-In Hair Extensions

*Before you begin reading the post, I suggest you click this video and let the music set the tone*

A little over a week ago, my life changed forever and immeasurably for the better.  No, I did not achieve enlightenment.  No, I did not cure cancer.  No, I did not adopt the golden retriever puppy of my dreams.

I had small pieces of someone else’s hair taped to my head.  And I could not be happier about it.

In my lifelong beauty journey, my hair has always seemed to be the one thing I just couldn’t quite get right, mostly because I was born with what my Mom (lovingly?) refers to as Your Dad’s Hair – i.e., very thin, curly hair that doesn’t want to grow much past my shoulders.  No matter how many deep conditioning treatments and highlights I put my hair though, nothing can replicate the fullness and thickness of simply having MORE hair.

So I finally decided to take matters into my own hands and set up a hair extensions consultation at Chicago Hair Extensions Salon (also known as the same place I have my eyelash extensions done.)  Here’s what I learned:

The Basics of Tape-In Extensions

The very lovely Ashley, my new hair guru, explained to me that I am a prime candidate for tape-in extensions because they are lightweight and easy to hide under my thin, fine hair.  Tape-ins add fullness, length and can be washed/curled/straightened/styled just as I do my own hair.   She told me I would need to come back in 6-10 weeks, depending on how fast my hair grows (Spoiler: It grows incredibly slowly) and she will move the extensions up and re-tape them.  The hair can be used 2-3 times before needing to purchase new extensions.

Here’s how the application process works.  It’s called the “sandwich method”:

I happily threw down my card and paid the down payment (we’ll get to price later…prepare yourselves) and I was counting down the seconds until I came back for application.

Before & After

For the application itself, Ashley instructed me to shampoo my hair twice before our appointment and not use ANY styling products.  Here’s what my hair looked like before extensions – this is also pre-flat iron, I promise I didn’t normally walk around looking this janky:

before

Not the greatest head of hair you’ve ever seen, right?  Well just 1 short hour later, my head looked like this:

after

Do you see the heavens parting?  Can you hear the angels rejoicing?  That is H-A-I-R, my friend.  Lots of it.  My hair is now a good 3-4 inches longer than before and sooooooo much thicker.  I am in love.

Ashley applied the majority of the extensions on the back and sides of my head up to ear level, making sure to leave the crown area alone so my own hair can cover the extension bonds.

I can’t really put into words how happy I was with my new fabulous, long, thick hair but my face makes it pretty clear:

full

And for one more comparison to show you what a difference the extensions make, here’s how my side braid looks before and after:

side-braid-beforeside-braid

Maintenance & Upkeep

I have to admit that it took me a couple days to:

  1. Get used to the added weight – So this is what it feels like to have thick hair!
  2. Walk past any reflective surface without stopping to admire and pet my hair
  3. Update what used to be my 5 minute hair care routine

Hair extensions are expensive so it’s important to treat them as gently as possible to get your money’s worth.  Here are the maintenance and upkeep must-do’s:

  • Use a loop or extension brush – My salon was kind enough to give me a free brush.  It’s crucial to have the proper brush or you can snag your extension hair or get caught up in the bonds when brushing.  Amazon has some great brushes.

    remysoft-loop-brush-for-hair-extensions_thumb155_crop

  • Sleep in a braid or low ponytail on a silk pillowcase – It’s important to keep your hair in a loose braid or low pony while sleeping to reduce tangling and pulling on the tape bonds.  Bonus: Sleeping with a braid gives you lovely waves in the morning.
    While it’s not an absolute necessity, I also highly recommend sleeping on a silk pillowcase to further reduce any snags – and you’ll wake up without those annoying sleep face lines.  I have the pillowcases below and they are amazing (and they stay super cold during the night):

    61dzgoa-8wl-_sl1500_

  • Sulfate-free is the way to be – Ashley emphasized that I can only use a sulfate-free shampoo when washing my hair and to concentrate on the top of my head, being sure not to scrub or pull on the tape bonds.  It’s also best to go a few days between washing to extend the life of your extensions. Batiste dry shampoo continues to be my best friend.

    batisteAfter shampooing, apply conditioner only from ears down and not near the bonds.  Conditioner can make the tape bonds loosen faster and we don’t want that.  I like to spray on leave-in conditioner to the mid lengths and ends each night before braiding.

  • Styling tips – It is a HUGE no-no to go to bed with wet hair when you have extensions, so I make sure to blow dry the bonds and top of my head, letting the length air dry.  Once the hair is dry, I use a heat protector spray and curl or flat iron.  It’s imperative to keep the curling iron or flat iron away from the tape bonds so always leave start an inch or two away from the bonds and you’re good to go.

    back                                                                 Post-blow dry and curling 

Price

If there is one downside to extensions, it’s obviously the price.  They are not cheap.  I don’t want to say the exact price I paid, partially because prices vary by salon, extension brand, applier, etc. and mostly because my Mom reads this blog and if I say the exact price I will Hear. About. It. the next time I’m back home. (Well, once she prints off this post at the tiny library a mile down the road and brings it home to read because my parents shun the internet. I am not making this up.)

I’ll give you a ballpark price of $400-800, which includes the hair extensions themselves and the installation labor. The price will be around $100-$150 every 6-10 weeks to have them moved up and re-taped.

Yes, I know this is expensive and quite frankly kind of a odd thing to do when you really think about it. But I’ve come to terms with the fact that I have a thing for spending my money on applying hair to different parts of my head. Some people go sky diving, some people bet on sports, some people buy houses. I buy hair and it makes me feel fabulous. The universe is working on all of us.

And there you have it!  My tape-in hair extensions experience thus far.  I’ll be sure to keep you posted on how things progress but for now, I couldn’t be happier.

Mascara Tips & Tricks

My oldest and truest love in the makeup world is mascara. It’s my “desert island” product. I have a minimum of 5 tubes in my makeup stash at any given time (stay tuned for my episode of Hoarders). I can’t live without it. Okay I could…but I don’t want to.  Why?  Because mascara makes a huge difference, especially for hooded eye folks like me, and there’s just something ultra feminine and Marilyn Monroe-esque about having long, fluttery lashes.  

Over my many years of mascara wearing and beauty researching, I’ve learned some helpful tips and tricks to get the most out of my lashes and I’m happy to share those tricks with you.  Here we go:

me
Right eye brought to you by the power of mascara; facial expression brought to you by seasonal allergies.

Heat It Up

It goes without saying that a good lash curler plays an integral part in making your lashes look their best. So before you start applying any makeup, throw your lash curler and/or mascara tube in your bra. Yes, you read that correctly.  

Heating up the curler helps lashes hold the curl longer while heating up the mascara softly melts the formula and leads to easier, smoother, less clumpy application.  Some beauty gurus advise heating up the curler with a hairdryer but I’m far too lazy for that and prefer to just stick my curler in my bra for a few minutes and let body heat do its thing.  Works just as well and really confuses anyone who happens to be watching you apply your face.

curler

Looks weird, works well

Line the Waterline

The majority of us aren’t #blessed with thick lashes but luckily it’s easy to fake them by lining the upper waterline.  This trick isn’t for the faint of heart because you’ll be putting a pointy object dangerously close to your eyeball but it really does make a world of difference:

tightline

Photo Credit: beautylish.com

Run a waterproof black or dark brown liner on that tiny strip of skin to fill in the gaps between lashes and give you a more cohesive, full lash look.

Use a Lash Primer

Not necessarily a must-have for every day, but when you really want to make lashes look extra long, thick and fabulous, apply a lash primer before mascara.  My favorite is the Benefit They’re Real Tinted Lash Primer:

benefit

Lash primer is also great for “no makeup” makeup looks, giving just enough color and length to make eyes look more open and awake without looking made up.

Swipe Time

Mascara application is where the real magic happens.  Most important application tips:

  1. Swipe Toward the Nose – Instead of just swiping the wand straight up, angle toward your nose to fan out the lashes and cut down on mascara transferring onto the eyelids.  No one likes dealing with that mess.

  2. Base and Blink – Set the wand as far down on your lashes as you can get, right at the base, wiggle it a bit to get mascara on the roots of your lashes, then slowly blink as you move the wand upward and toward your nose in one fluid stroke.

  3. Coat Both Sides – Don’t forget the top side of your lashes!  Once you’ve done the base and blink technique, look down and coat the top of the lashes all the way up to the tips.

Revive Old Mascara with Eye Drops

There always comes that inevitable time when a tube of well-loved mascara turns dry, clumpy and basically unusable.  This is a good excuse to run out and buy another one but if you want to revive the mascara and stretch your money, add a couple squeezes of eye drops to the tube and swirl everything around with the wand.  Voila! Mascara resurrection.

drops

And there you have it, my best mascara tricks.  What is your lash secret weapon?  Let me know!

Products I’m Loving Lately

Today I have a random assortment of makeup, hair and skin products I’ve been using and lovely lately.  There is no rhyme or reason to this mix of products – some I’ve purchased myself and some are samples from Birchbox.  There are few things I love more than beauty products AND receiving packages in the mail so Birchbox has been very up my alley and a great introduction to brands and products I might have never tried.  So, let’s get to it:

Eyes

Two Faced Better Than Sex Mascara

Photo Credit: samanthalalaa.wordpress.com, amazon.com 

The name is certainly…memorable, and it should be, because this mascara is excellent (and I have tried an embarrassing number of mascaras).  While it is great, it can be a bit tricky to work with and quickly turn clumpy.  Go slowly when applying and keep an eye on (pun, sorry) how your lashes are progressing and you’ll be just fine.  This mascara will give you long, full lashes that border on looking like falsies.  If that’s your thing, I highly recommend picking up a sample size at Ulta to see if you like it because it can be pricey. I’m always looking out for you.

Eyeko Fat Liquid Eyeliner

Photo Credit: birchbox.com

I received this liner in a Birchbox and at first glance I thought it would be hard to work with, but it is surprisingly easy to use.  Well, as easy as applying liquid eyeliner can be.  Another huge plus is the color payoff – very black, very matte and long-wearing.  I had typically used brush and/or long, fine tipped liners but Eyeko has convinced me that the marker shape is by far the easiest to use and it will be my go-to from here on out.  

Kat Von D Shade & Light Eye Contour Palette

Some day you might turn on Hoarders and see me, surrounded by mountains of eyeshadow palettes instead of garbage and cats, with my finger hovering over the “Add to Cart” button on Sephora.  What I mean is – I have no self control and bought yet another eye shadow palette. The first step is admitting it.

But in my defense, I did my research and bought the absolute best and most useful palette I could find.  Shade & Light has all matte shadows, warm and cool toned neutral colors, with fantastic pigmentation and blendability.  This palette is perfect for everyday looks, smokey eyes, mature/hooded eyes….really anyone with eyes.  

Here are a few of my favorite Shade & Light tutorials I’ve tried out and loved:


Lips

POP Beauty Matte Velvet Lipstix in Satin Rose

Photo Credit: popbeauty.com

Another gift from the Birchbox gods, this is a great everyday soft pink lipstick.  This color looks good with everything and I imagine every skin tone.  The formula isn’t too sticky or too glossy and it has pretty great staying power.  Satin Rose is definitely my favorite new “my lips but better” product.

Hair

Redken All Soft Conditioner

Photo Credit: amazon.com

My hair is naturally curly and very fine.  I also bleach and dye my hair monthly to be blonde which leads to the perfect storm of damage and overall terribleness.  Thankfully, there are a ton of products out there to make hair like mine more manageable.  One of my new favorites is the Redken All Soft conditioner.

Redken products are  a bit more expensive than my regular drugstore staples so to stretch it and make my money last, I mix a small amount of this conditioner with the Aussie 3 Minute Miracle Deep Conditioner.  Leaving that combination on for 5-10 minutes a couple times a week makes a huge difference in the softness of my poor abused hair.

Skin

Soap & Paper Factory Green Tea & Shea Hand Cream

Photo Credit: theoliviashop.com

This stuff smells AMAZING and the older I get, the more I seem to get into hand creams.  It’s the circle of life.

All hand creams basically do the same thing, hydrate your skin, so really the only reason this cream is so great is the heavenly smell (and the cute packaging).  

What products are you loving?  Let me know!

5 Favorite Spring Nail Colors

As I type this, the temperature is currently 20 whole degrees, it’s windy AF (thanks, Chicago) and tomorrow the high is 12. Degrees. Fahrenheit.  TWELVE.  And I’m over it.  Done with winter.  Beyond ready for spring.

While the rest of my body is covered head to toe in multiple layers so I don’t freeze to death while walking to the liquor store gym, my nails are sporting some seriously bright colors.  Because I’m ready for spring.  Now.  Have I mentioned that?

So if your nails are also very ready for springtime, I suggest picking up any of these 5 polishes:

OPI – Shorts Story

SS bottleshorts story


Photo credit: OPI.com, my awesome hand

This is the perfect hot pink.  Not too bright, not too soft, just right.  The smooth consistency dries to a shiny finish and you’ll only need two coats.  Perfect.

OPI – Show Us Your Tips

NLN62_G_ShowUsYourTipstips.jpg

Photo credit: OPI.com, my other awesome hand

A brand new polish from the 2016 New Orleans Spring/Summer collection, try to get past the ridiculous name and bask in the glow of the periwinkle sparkles.  The consistency is a little on the thin side, so you’ll need a good 2-3 coats, but it’s worth it.

China Glaze – Aquadelic

beautyjudy

Photo credit: beautyjudy.com 

One of my all-time favorite polishes. Aquadelic is a bright robin’s egg blue-green that will make you very jealous of the actual robins all hanging out in the south for the winter.  Bonus: China Glaze polishes are just as good, and sometimes better than, OPI polishes and quite a bit cheaper.  Win.

 China Glaze – Peachy Keen

nailpolishcanada

Photo Credit: nailpolishcanada.com

Yet another China Glaze gem, Peachy Keen is a soft, orange creamsicle color.  This one looks great on any skin tone.  The formula is nice and opaque so two coats will do the trick.

OPI – Look At My Bow!

OPI-x-Hello-Kitty-Nail-Lacquer-Look-My-Bow

Photo Credit: popsugar.com

Everyone needs a bubblegum pink in their collection. This polish is brand spanking new from the 2016 Hello Kitty collection, perfect for spring, and takes 2-3 coats to set at a lovely creamy consistency.

Stay warm and polished, my friends.


Super Bowl 50 Makeup

FullSizeRender

Three things I dearly love:

  1. Makeup
  2. Sports
  3. A theme

In honor of Super Bowl 50, I’ve combined all three loves in 2 different eye looks using the Denver Broncos and Carolina Panthers team colors.  Yes, I do have too much time on my hands.

But really, who wants to live in a world where people eat copious amounts of junk food, drink beer and watch grown men knock each other down without matching their eye makeup to the team they’re cheering for? Certainly not me.

Whether you’re Team Cam or Team Peyton (or Team Brady like me and extremely bitter), we can all agree that makeup is the real MVP. In case you’ve also always wanted to match your makeup to a jersey, here are two Super Bowl 50 inspired eye looks:

IMG_1173

I really need to buy an actual camera and learn to pose but you get the idea

Look 1: Denver Broncos
Denver_Broncos_Logo
– Lid: Roulette (Makeup Geek)

– Outer corner: Lucius (Kat Von D Shade & Light palette)

– Crease: Laetus (Kat Von D Shade & Light palette)

– Liner: Navy (Tarte gel liner)IMG_1165
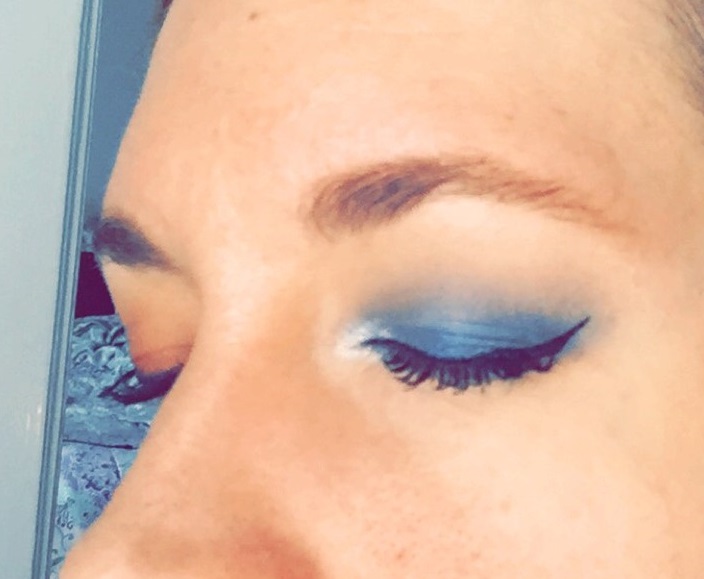
Look 2: Carolina Panthers

CarolinaPanthers2012

IMG_1169

All shadows from the Urban Decay Vice 2 palette

vice 2
– Lid: Madness

– Inner corner: Shellshock

– Outer corner: Prank

– Crease: Dope + Habit

– Liner: Eyeko Fat Liquid Liner in Black

FullSizeRender

Brows: Anastasia Beverly Hills Brow Definer – Soft Brown
Lashes: Urban Decay Perversion Mascara – Black


Hope you enjoy trying out these looks and let’s all root for the one thing we can all agree on – good commercials.

Review: Aztec Secret Indian Healing Clay Mask


aztec mask

I’m back, it’s a new year and I have a new favorite face mask.  And this product couldn’t have come at a better time.  I won’t bore you with the gory details but I’ve been sick for roughly the last month (but am finally almost better, yay!) and when my body isn’t feeling well, my skin likes to go absolutely insane.  Not fun.

But there are perks to spending hours in bed feeling like garbage. The universe smiled upon me and I fell down the Amazon beauty reviews rabbit hole and discovered the immensely popular Aztec Indian Healing Clay.  With 4.5/5 stars and over 7,000 reviews I knew this stuff had to be good, but now I’m convinced this one pound tub of dirt has actual magical properties.

So what’s so great about this stuff?  Here are the basics, per Amazon:

  • World’s most powerful facial
  • Deep pore cleaning
  • 100% natural calcium bentonite clay
  • Does not contain: additives, fragrances, animal products


Az1

                 Photo credit: inhautepursuit.com

They forgot to mention that it’s cheap!  A one pound tub will set you back $9, and when you only need one tablespoon per mask, it’s going to last you a loooong time.

Now let’s get down to business.  Here’s how to make the mask:

Az2

        Photo credit: labmuffin.com

You’ll need the clay, a non-metal bowl and spoon and apple cider vinegar.  All of the Amazon faithful suggested Bragg’s Raw Organic Apple Cider Vinegar so that’s what I’ve got.  It smells a bit like rotting apples but hey, it works.

A couple tips before you mix your mask:

  1. Put your hair up or out of your face because, duh.
  2. Eat or drink something if you want because once this baby is on your face, you can’t eat/talk/drink/smile for a good 20-30 minutes. That’s how intensely this mask dries and pulls the junk out of your face.

Once that’s out of the way it’s time to get started. Mix clay with equal part of raw apple cider vinegar (I use 1 tablespoon of each) in a non-metal bowl. Stir the mixture into a smooth paste.  Apply all over the face.  You should look something like this:

Az3

    Photo credit: uk.pintrest.com

Now the fun part begins.  As this mask dries, you will feel your face pulsate like crazy.  This is good.  Don’t be scared.

The mask will become very tight while it dries and hardens.  If you have oily skin like me, keep the mask on for 30 minutes.  Normal and more sensitive skin can get away with 10-20 minutes.

Pro Tip: While your mask dries, take advantage of your green face and channel your inner Jim Carrey.  I suggest dancing around to this song:

Once enough time has gone by and your mask is dry, soak a washcloth in warm water and lay it over your face for a minute or two to begin loosening everything up.  You don’t want to try to start washing it off right away or the chips of mud will clog your drain and no one wants that.

Apply a nice, heavy moisturizer post-facial.  I usually do my masks at night in the bathtub with a glass of wine I drink through a straw and follow up with the Olay Classic Night Cream.
Az4

Photo credit: amazon.com

You’ll notice that your face is very red after the mask is off but this is normal and will go away in 30-ish minutes.  You’ll probably also notice that your face is beyond smooth and soft, and that’s just one of the benefits.  The others include:

  • Smaller pores and cleaned-out blackheads
  • Reduction in excess oil production
  • Elimination of acne. Honestly, I have not had a spot since using this mask 2-3x per week for the past month and a half.  And that, my friends, is a goddamn miracle.
  • Softening of fine lines and wrinkles
  • Skin tone is more even, rough patches are smoothed
  • Glowing skin like the light of a thousand suns

In short, this tub of clay is the real deal.  It’s definitely worth the money and I’m excited to try other uses for it – hair masks, foot soaks, you name it.  If you’re a fan of face masks or just want to give your skin a detox to start 2016 off right, I very highly recommend picking up some Aztec Healing Clay.

Review: Maybelline Fit Me Matte + Poreless Foundation

Like many makeup junkies, I am on a never-ending quest to find the perfect liquid foundation.  The definition of “perfect” is different for everyone so here’s mine:

  • Medium coverage without looking/feeling overly made up or cakey
  • Helps control my oily skin and keep shine to a minimum
  • Won’t break me out or clog pores
  • Relatively inexpensive (although I’ve been known to temporarily lose my mind and a lot of money if a foundation really works miracles)

fit me

Photo Credit: maybelline.com

Last week I picked up the Maybelline Fit Me Matte + Poreless Foundation and after using it daily, I have to say, I think my quest is over.  This just may be the perfect foundation – and it’s less than $10 (!!).  Here’s why I’m in love:

  • A little goes a long way. I apply a small amount to my brush (quarter sized amount) and the end result is a lightweight, flawless finish that never feels heavy on my skin.
  • Great coverage. Maybelline isn’t joking when they say that this foundation adjusts to match your skin and evens out tone and color. I use shade 120 in Classic Ivory – it cancels out my red tones and never morphs into that weird orange color as the day goes on like other foundations can do.
  • No need for primer. I’ve learned the hard way that while primer does go a long way in giving me a flawless canvas to apply my foundation, it also can break me out like crazy. Thankfully, Fit Me looks great without a primer and applies smoothly, even over rough patches/blemishes.
  • Oil control. I pray to God and Beyoncé each night that my face will eventually stop producing insane amounts of oil, but so far, no luck.  The matte finish does an impressively good job of keeping shine under control throughout the day.  Although the formula is liquid, Fit Me sets more like a powder foundation. Unless you have Exxon-levels of oil like me, you can definitely get away with wearing Fit Me sans powder.
  • Price. It’s only $6! This isn’t one of those foundations that you ration out every drop because it costs you more than a month’s worth of groceries. This is a foundation you pick up at CVS while you’re bored and feel zero guilt, and that’s the best feeling of all.

Curly Hair Routine & Favorite Products

When it comes to my hair, I live a lie most of the time.  As I’ve mentioned before, I almost bankrupt myself every month maintaining my dyed blonde hair. I also spend a fair amount of time fighting against my natural curls and beating them into submission with blow-drying, flat ironing and curse words.

But every now and then I say screw it and let the curls fly free.  As any curly girl knows, it takes some product and practice to get your curls to behave and look their best.  Here’s my tried and true curly hair routine and favorite products:

carrie

Photo Credit: fashionista.com
  • Curl Activating Shampoo and Conditioner

Do curl activating shampoos and conditioners really help your curls be the best they can be? I think so.  Is it all a placebo effect and I’m just lighting my money on fire?  Maybe.  Either way, I use the L’Oreal EverCurl Hydracharge Sulfate-Free Shampoo and Conditioner  because I think it gives my curls a little more oomph and makes them soft and shiny.

shampoo

Photo Credit: drugstore.com
  • Thou Shalt Not Use A Towel

Towels might seem all warm and cuddly and non-threatening but rub one on your freshly washed curls and you’re in for trouble and a LOT of frizz.  Instead, use an old, soft cotton T-shirt to blot your hair (don’t rub, don’t you dare rub) and squeeze out the excess water.  The key to frizz-free curls is to touch them as little as possible.

blue

Photo Credit: target.com
  • Define Those Curls

Now we’re getting somewhere.  While my hair is still fairly wet, I scrunch the curls with Paul Mitchell’s Round Trip Curl Definer.  This stuff is great because it’s not a gel but more of a serum that helps separate and define your curls without weighing them down and making them stiff.  Gel + wet curls = crunchy late 80’s Jessie Spano hair and we don’t want that.  What we’re going for is more “Penny Lane in Almost Famous” curls.

PL

Photo Credit: teachmix.com

  • Don’t Touch

This is one of the most important steps: Do nothing.  Walk away.  Do not touch your curls.  Let them air dry for a bit while you put your makeup on or do whatever else your heart desires.

  • Mousse and Style

We’ve reached the home stretch!  Once your hair is almost completely dry, scrunch/carefully comb through a golf ball-sized amount of mousse through your curls.  My go-to is the Aussie Mousse + Leave-In Conditioner because it smells AMAZING and the leave-in conditioner leaves my hair super soft.

mousse

Photo Credit: makeupalley.com

  • Finishing Touches

If you’ve got the time, I highly suggest using a curling iron roughly the size of your curls to define the top layer.  I like to randomly pick small pieces and alternate the direction of the iron so that it looks more natural.  My curls aren’t tightly wound so I stick with an inch or 1.5 inch iron.

iron

Photo Credit: ulta.com

And that’s it! Enjoy your curls 🙂

curls

Fall Makeup: 90’s Edition

Break out your plastic chokers and find the brown lipstick in the bottom of your Caboodle because the 90s are back!  And they’re back just in time.  Summer is over, tans are fading, leaves are changing color, and it’s time for makeup to change, too. Fall colors + 90’s makeup revival = match made in beauty heaven.

cindy chic stylista

Photo Credit: chicstylista.com

Eyes
Typical fall colors tend to be on the warm side – burgundy, orange, and every shade of bronze and brown imaginable. Brown seemed to have been THE color when it came to 90’s makeup, from lips to eyes.  Popular eye looks in the 90’s used matte shadows but I need a little shine in my life, so naturally I’ve fallen in love with Makeup Geek’s Roulette:

roulette temptalia

Photo Credit: temptalia.com

This shimmery, copper shadow is gorgeous on the lid and blends easy with matte colors in the crease.  And thanks to colors and science and light and all that good stuff, the orange tones in the shadow make blue and green eyes pop something fierce.  TL;DR – Roulette is October in eyeshadow form.  And it’s only $6.

Lips

90s


I know, I know.  Dark lip colors in the fall is the makeup equivalent of “Florals for spring? Groundbreaking.” For my 90’s inspired fall makeup, I’m veering away from the traditional wine and berry  autumn lip colors.  I’m all about matte and brown.  In the picture above I’m wearing my new lipstick of life: Urban Decay’s 1993.

1993 phyrra.net

Photo Credit: phyrra.net

1993 has just enough red tones to not be completely brown, thankfully, because no one wants to look like a corpse unless it’s actually Halloween.  1993 has a matte formula, always applies smoothly and doesn’t dry out my lips.  Pair this with the 1993 lip liner and you’ll feel like you’re an extra on My So-Called Life (I mean that in a good way).

Keep the monochromatic 90’s trend going with some matte bronzer and warm toned blush, and you’re all set.  Happy Fall!