How to be 30 and Single

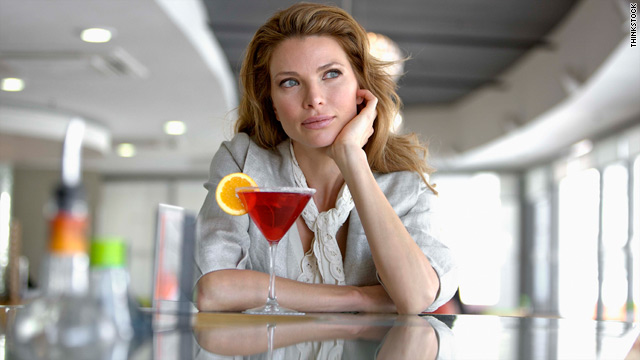
When you’re single in your 20s, it’s assumed that you’re having the time of your life and in no mood to settle down.  When you’re single at 30, it’s assumed that the world is no longer your oyster, you’ve begun collecting cats and spend your time staring off into the abyss waiting and hoping for a potential mate to come along.

I’m here to tell you that being 30 and single is not the end of the world. In fact, it can be, dare I say it…enjoyable.  Like everything in life, there are good parts and bad parts about being single at this age. The bad parts are things like being stuck at the kid’s table for Thanksgiving dinner; the good parts being enjoying ample free time, meeting new people and sprawling across your bed with ALL of the covers.

While I’m certainly not the authority or a certified expert on how to be single (it’s different for everyone), I have enough experience to know what works for me.  So, here are my three best suggestions on how to make the most of it:

Be prepared for The Questions

Yes, The Questions can be annoying and frustrating.  It seems that everyone wants to know the answer to the million dollar question – Why/How are you single? This is inevitably followed up by the asker listing a litany of reasons why you shouldn’t be single – you’re attractive, you’re intelligent, you’re fun, etc.  People may think they’re being helpful or flattering when listing these reasons but sometimes it can leave you later saying to yourself “Yeah, why the hell am I still single? What’s wrong with me? What am I doing wrong?” when really, you haven’t done anything wrong.  You’re just not in a relationship right now. Point blank.

My advice is to take these questions in stride.  It may seem odd but I find having a stock answer helps.  I tend to go with “I haven’t found the right guy yet but he’s out there.  I’m enjoying myself in the meantime.” That response usually shuts down the questions (and the pity party) and hopefully allows you to change the subject to another topic, if you’d like.  I try to remind myself that, depending on the setting, I may be one of only a few single people in attendance, and being different will inevitably make people curious and want to ask questions.


Enjoy It

So often the “single” label is looked upon with pity, disdain and as a problem that needs to be fixed.  But there is another side to being single that needs to be talked about – the side that I like to call Do Whatever The F**K You Want.  Want to spend the day at the beach reading celebrity gossip magazines? Go for it. Want to listen to your favorite songs as loud as possible and have a dance party in your apartment on a Tuesday? I feel you, and I raise my glass of wine to you.

The joy and freedom that come with being single should never be overlooked or taken for granted.  Use this time to do the things that you want to do, things that you may not have the time, energy or money to do a few years down the road.  Pick up new hobbies, read more books, spend time with friends and family or work on yourself. Do whatever it is that makes you feel good.  Being single isn’t a prison sentence that needs to be served.  It’s an opportunity to expand your life.


Love Yourself

In the immortal words of RuPaul, “If you can’t love yourself, how in the hell are you going to love somebody else?”  I know, I know.  It all sounds cheesy but it actually is true – we accept the love we think we deserve and we attract people who mirror how we feel about ourselves.

You may not have a partner at the moment but you have yourself, and really, that’s the only person you can be certain you’ll ever have in this life.  You don’t need to wait for another person to come along to make you feel worthy of being loved. Treat yourself well and take care of yourself in the ways you want to be treated, and you’ll find that you’re ready and able to accept the love of a great partner heading your way.

*Photo Credit: thesinglewomansguide.com

Review: Maybelline Fit Me Matte + Poreless Foundation

Like many makeup junkies, I am on a never-ending quest to find the perfect liquid foundation.  The definition of “perfect” is different for everyone so here’s mine:

  • Medium coverage without looking/feeling overly made up or cakey
  • Helps control my oily skin and keep shine to a minimum
  • Won’t break me out or clog pores
  • Relatively inexpensive (although I’ve been known to temporarily lose my mind and a lot of money if a foundation really works miracles)

fit me

Photo Credit: maybelline.com

Last week I picked up the Maybelline Fit Me Matte + Poreless Foundation and after using it daily, I have to say, I think my quest is over.  This just may be the perfect foundation – and it’s less than $10 (!!).  Here’s why I’m in love:

  • A little goes a long way. I apply a small amount to my brush (quarter sized amount) and the end result is a lightweight, flawless finish that never feels heavy on my skin.
  • Great coverage. Maybelline isn’t joking when they say that this foundation adjusts to match your skin and evens out tone and color. I use shade 120 in Classic Ivory – it cancels out my red tones and never morphs into that weird orange color as the day goes on like other foundations can do.
  • No need for primer. I’ve learned the hard way that while primer does go a long way in giving me a flawless canvas to apply my foundation, it also can break me out like crazy. Thankfully, Fit Me looks great without a primer and applies smoothly, even over rough patches/blemishes.
  • Oil control. I pray to God and Beyoncé each night that my face will eventually stop producing insane amounts of oil, but so far, no luck.  The matte finish does an impressively good job of keeping shine under control throughout the day.  Although the formula is liquid, Fit Me sets more like a powder foundation. Unless you have Exxon-levels of oil like me, you can definitely get away with wearing Fit Me sans powder.
  • Price. It’s only $6! This isn’t one of those foundations that you ration out every drop because it costs you more than a month’s worth of groceries. This is a foundation you pick up at CVS while you’re bored and feel zero guilt, and that’s the best feeling of all.

Curly Hair Routine & Favorite Products

When it comes to my hair, I live a lie most of the time.  As I’ve mentioned before, I almost bankrupt myself every month maintaining my dyed blonde hair. I also spend a fair amount of time fighting against my natural curls and beating them into submission with blow-drying, flat ironing and curse words.

But every now and then I say screw it and let the curls fly free.  As any curly girl knows, it takes some product and practice to get your curls to behave and look their best.  Here’s my tried and true curly hair routine and favorite products:

carrie

Photo Credit: fashionista.com
  • Curl Activating Shampoo and Conditioner

Do curl activating shampoos and conditioners really help your curls be the best they can be? I think so.  Is it all a placebo effect and I’m just lighting my money on fire?  Maybe.  Either way, I use the L’Oreal EverCurl Hydracharge Sulfate-Free Shampoo and Conditioner  because I think it gives my curls a little more oomph and makes them soft and shiny.

shampoo

Photo Credit: drugstore.com
  • Thou Shalt Not Use A Towel

Towels might seem all warm and cuddly and non-threatening but rub one on your freshly washed curls and you’re in for trouble and a LOT of frizz.  Instead, use an old, soft cotton T-shirt to blot your hair (don’t rub, don’t you dare rub) and squeeze out the excess water.  The key to frizz-free curls is to touch them as little as possible.

blue

Photo Credit: target.com
  • Define Those Curls

Now we’re getting somewhere.  While my hair is still fairly wet, I scrunch the curls with Paul Mitchell’s Round Trip Curl Definer.  This stuff is great because it’s not a gel but more of a serum that helps separate and define your curls without weighing them down and making them stiff.  Gel + wet curls = crunchy late 80’s Jessie Spano hair and we don’t want that.  What we’re going for is more “Penny Lane in Almost Famous” curls.

PL

Photo Credit: teachmix.com

  • Don’t Touch

This is one of the most important steps: Do nothing.  Walk away.  Do not touch your curls.  Let them air dry for a bit while you put your makeup on or do whatever else your heart desires.

  • Mousse and Style

We’ve reached the home stretch!  Once your hair is almost completely dry, scrunch/carefully comb through a golf ball-sized amount of mousse through your curls.  My go-to is the Aussie Mousse + Leave-In Conditioner because it smells AMAZING and the leave-in conditioner leaves my hair super soft.

mousse

Photo Credit: makeupalley.com

  • Finishing Touches

If you’ve got the time, I highly suggest using a curling iron roughly the size of your curls to define the top layer.  I like to randomly pick small pieces and alternate the direction of the iron so that it looks more natural.  My curls aren’t tightly wound so I stick with an inch or 1.5 inch iron.

iron

Photo Credit: ulta.com

And that’s it! Enjoy your curls 🙂

curls