Double Duty: Health & Beauty Supplements

Happy 2017!  At least I think it’s “happy”?  The rotting orange peel with tiny hands might be hurtling us towards the apocalypse so let’s keep our minds off that and focus on good, actual happy things.  Things like our healthy, beautiful, still-alive bodies.

The start of a new year seems to always push us to improve our health.  I have a few diet/nutritional supplements I like to use that will make your body feel great while providing awesome beauty benefits.  Let’s get to it.

Apple Cider Vinegar

acv

Apple cider vinegar has a billion health, cooking, cleaning and beauty uses.  Seriously. Here’s how I use it in my beauty routine:

  • Put a tiny bit of ACV on a cotton ball and use as a toner. Especially great for oily skin.
  • Mix ACV with Aztec Clay for a super powerful, deep cleansing face mask.
  • Spray on hair post-shampoo for soft, shiny locks. Or, mix ¼ cup ACV with 2 cups water for a rinse that will restore the natural pH level of the scalp and remove product buildup.


Collagen

collagen

As we age, the body’s natural collagen production slows down.  Sad but true.  Thankfully we live in the future and can go on the internet machine and order a tin of powdered collagen from Amazon whenever we please.  I put a couple scoops in my coffee every morning and can’t even taste it.  What exactly does collagen do for beauty?  So glad you asked:

  • Collagen can help reverse signs of aging and increase skin elasticity and moisture.
  • Helps reduce the appearance of cellulite! As we keep making trips around the sun, structural changes take place in the skin that weaken and decrease collagen production, leading to the more prevalent appearance of cellulite. Taking collagen as a supplement can help.  Thank God.
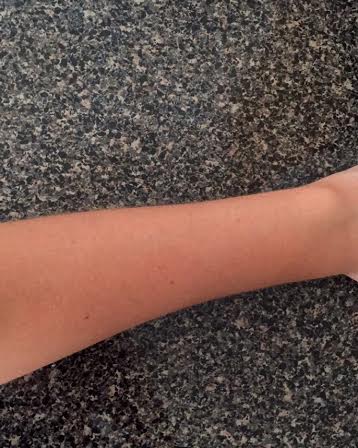
  • Collagen helps speed up hair and nail growth.

nails.png

Those are some strong looking nails amirite

On the health benefit side, collagen improves digestion, supports joint and bone health and is a good source of protein.  I’m a fan of the Great Lakes Gelatin brand because I’m a sucker for all things Great Lakes (aka Michigan) related.


Protein Powder

protein

Speaking of protein, a few scoops of whey protein powder in a smoothie, shake or oatmeal, several times per week, can have serious beauty benefits:

  • Adequate amounts of protein are crucial for healthy and strong skin, hair and nails.
  • Protein helps build lean muscle and accelerates metabolism to keep that body looking A+

Fresh-Fabulous-Body-Rolling.gif

Fish Oil

fish-oil

I’m the type of person who prefers not to eat any type of seafood.  Ever.  I will pass up sushi for Taco Bell every day of the week.  I know, so classy, such sophistication.   But – there are tons of health and beauty benefits from eating fish and I don’t want to miss out on the party.  Enter fish oil capsules.  Aside from helping keep the heart healthy, fish oil can up your beauty game:

  • The fatty acids in fish oil supply hydration to skin, help reduce inflammation and work to ward off acne and wrinkles.
  • The omega-3 fatty acids also protect skin against sun damage and nourish hair follicles.
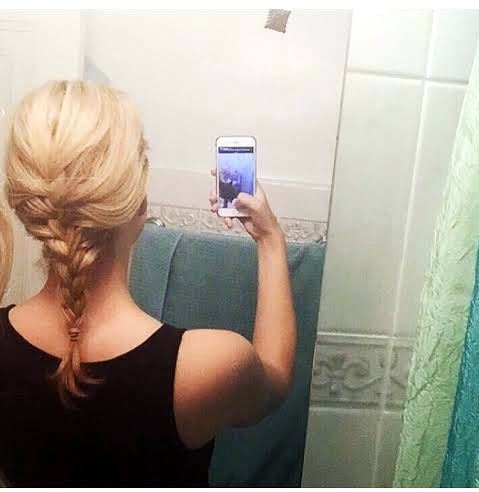
  • If you’re like me and abuse your hair with dyes, chemicals and extensions (whoops), fish oil provides strength and shine to fragile or weakened hair.

Source


Multivitamin + Biotin

gummiesbiotin1

Can’t forget about the classic, the OG, the multivitamin.  Since I am eternally 12 years old, I’m all about the gummy vitamins but any multivitamin will do.  Although my mutli contains biotin, I’m a “more is more” kind of person and take a biotin capsule every day, too.  Here’s why:

  • Biotin is crucial for healthy, strong nails and hair. My nails grow crazy fast when I’m on top of my biotin regimen.
  • A multivitamin helps fill in the nutritional gaps from your diet. And for someone like me who eats pizza more times per week than vegetables, that’s important.  Having the right balance of vitamins and minerals in the body promotes overall health and when you feel good, you look good.

I promise that I did my Googles for this post and it’s all true, but try these supplements out for yourself and see what you think.  Here’s to a happy and beautiful 2017!


Updo Made Easy

IMG_1591

I can do all things through YouTube who teaches me

Quick post for you today on a super easy hair tutorial from The Small Things Blog.  I’m a bit hair challenged when it comes to styling for a fancy night out, but following the tutorial below made everything super quick and easy and my updo turned out great, if I do say so myself.

Product recommendation for my fellow fine-haired ladies – Got2b Fat-tastic Thickening Plumping Mousse is AWESOME.  It really does plump up your hair and give it so much more body and fullness.  Plus, having that extra product in your hair helps the updo stay in place – if your hair is too squeaky clean the pins have a tendency to slip out.

Got2b Fat-tastic Thickening Plumping Mousse, 8.5-Ounce

Typically I have to tease like crazy to get any volume or height on the crown of my head but this mousse had my hair looking like I stepped right out of 1960 (my preferred aesthetic for ever and ever amen.)  Just apply to damp hair, blow dry and style as usual. Highly recommend it.

With a good tutorial and the right products, an updo doesn’t have to be an intimidating, time consuming process.  Hope you enjoy and feel free to let me know your favorite updo tips & tricks!

Inner Beauty: Meditation

You’ve no doubt heard the saying “It’s what’s on the inside that counts” and I believe that’s very true.  I focus quite a bit on outer beauty on this site, and while that’s a lot of fun and beauty products can certainly help boost confidence, enhance physical features and disguise “flaws”, it’s time to talk about something even more important: inner beauty.  The real deal.  The soul behind the lipstick.  (Sorry, that was cheesy).

My favorite way to cultivate inner “beauty” a.k.a peace is through daily meditation.  I’m not talking about religion, I’m not talking about selling all of your possessions and living a life of silence in a monastery.  I’m talking about simply setting aside a few minutes every day to do nothing but breathe.  That’s it.

Sitting in silence may not sound like much but meditation can have a profound impact on mental peace and clarity, reduce stress and lead to improved overall health. (Check out this link for more info on the many benefits of meditation.)  All of the makeup in the world won’t help you feel beautiful if you’re not feeling content on the inside, so why not set aside a small slice of your day to slow down the incessant thoughts and reeeeeelax?  The world can be crazy; you deserve a break.

silence

If you’re brand new to meditation, start with just 2-3 minutes of sitting silently with your eyes closed.  Find a quiet place, set an alarm on your phone for 2 minutes, silence that bastard, close your eyes and listen to your breathing. Gradually add one or two minutes every couple of days until you’ve worked up to a 10-15 minute session.  Or, if you’d like a bit more instruction, I highly recommend downloading the Headspace app.

The point of meditation is not to stop all thoughts or to completely clear the mind, although it is a very welcome bonus when that rarely does happen, the goal is to let your thoughts float in and out of your awareness without getting attached to them.  Sometimes I find that the second I close my eyes to meditate my brain wants to start making lists of things I need to do, recall embarrassing moments, or recite Whitney Houston lyrics.  Not exactly the way to inner peace.

Instead of getting caught up in those thoughts and spending the whole 10 minutes thinking, I try my best to focus all of my attention solely on my breath.  The feeling of air coming into and going out of my body. The sounds my breath makes. The sensation of my chest rising and falling.  Any time my mind wanders I acknowledge that I’m caught up in thinking and return my attention back to my breath.  This definitely takes practice but gets easier with time.

Enough background – let’s get down to it.

meditation 2

Here are my best meditation tips:

  1. Meditate at the same time and in the same place everyday.
    I try to meditate for 10 minutes in the morning before work and 10 minutes in the evening.  Some people like to sit cross legged on the floor on a cushion to meditate, some people like to lay down, some people like to walk.  I personally meditate sitting in an old blue La-Z-Boy chair.  Whatever works.  Setting a daily repeating event reminder in my phone and sitting in my designated meditation chair helps keep me in the habit.
  2. Set a timer, silence the phone, leave it alone.
    Nothing will take me out of the flow of meditation faster than my phone beeping with a new Snapchat notification, so before beginning I’ll silence my phone, set an alarm for 10 minutes and leave the phone on the other side of the room so I’m not tempted to peek.  Pro tip: Use the Chimes alarm sound if you have an iPhone – I find it’s the least jarring when the alarm goes off.
  3. Let it go.
    Yes, your mind is going to wander.  That’s what it does.  Don’t beat yourself up or get frustrated with it.  Notice when you’re starting to get caught up in thoughts and gently bring all of your attention back to the sound and feeling of your breath.  As long as you let the thoughts come and go without fighting them or getting attached to their story, you’re golden.
  4. End with gratitude.
    Gratitude is a powerful thing.  It’s also a great way to end a meditation session.  It can be tempting to jump up when the timer rings and rush back into life, but I find giving my meditation the same ending each time helps tell my brain “We’re done now” while easing back into my normal routine with positivity.

    So when the chimes ring, I silently tell my inner being/God/the universe/whatever you want to call it: “Thank you.  I appreciate you.  I love you.”  Now I know that may sound incredibly cheesy and I admit I did feel weird saying it the first few times (even though I’m just thinking it!) but I swear it helps. Give it a try.
  5. Enjoy the benefits.
    A daily meditation ritual can help you feel more relaxed overall, build better concentration, help with maintaining emotional balance and generally give you a more content, peaceful feeling during your non-mediating time.  Perhaps most importantly – meditation teaches you that thoughts are just thoughts.  They come in and out of your awareness all day long.  Instead of getting wrapped up their endless stories, you’ll find there is always a deep inner peace underneath all those thoughts that you can always connect with whenever you need to.

Here are some guided meditations from YouTube I really like, if you’re into that sort of thing:

Namaste 🙂

Mascara Tips & Tricks

My oldest and truest love in the makeup world is mascara. It’s my “desert island” product. I have a minimum of 5 tubes in my makeup stash at any given time (stay tuned for my episode of Hoarders). I can’t live without it. Okay I could…but I don’t want to.  Why?  Because mascara makes a huge difference, especially for hooded eye folks like me, and there’s just something ultra feminine and Marilyn Monroe-esque about having long, fluttery lashes.  

Over my many years of mascara wearing and beauty researching, I’ve learned some helpful tips and tricks to get the most out of my lashes and I’m happy to share those tricks with you.  Here we go:

me
Right eye brought to you by the power of mascara; facial expression brought to you by seasonal allergies.

Heat It Up

It goes without saying that a good lash curler plays an integral part in making your lashes look their best. So before you start applying any makeup, throw your lash curler and/or mascara tube in your bra. Yes, you read that correctly.  

Heating up the curler helps lashes hold the curl longer while heating up the mascara softly melts the formula and leads to easier, smoother, less clumpy application.  Some beauty gurus advise heating up the curler with a hairdryer but I’m far too lazy for that and prefer to just stick my curler in my bra for a few minutes and let body heat do its thing.  Works just as well and really confuses anyone who happens to be watching you apply your face.

curler

Looks weird, works well

Line the Waterline

The majority of us aren’t #blessed with thick lashes but luckily it’s easy to fake them by lining the upper waterline.  This trick isn’t for the faint of heart because you’ll be putting a pointy object dangerously close to your eyeball but it really does make a world of difference:

tightline

Photo Credit: beautylish.com

Run a waterproof black or dark brown liner on that tiny strip of skin to fill in the gaps between lashes and give you a more cohesive, full lash look.

Use a Lash Primer

Not necessarily a must-have for every day, but when you really want to make lashes look extra long, thick and fabulous, apply a lash primer before mascara.  My favorite is the Benefit They’re Real Tinted Lash Primer:

benefit

Lash primer is also great for “no makeup” makeup looks, giving just enough color and length to make eyes look more open and awake without looking made up.

Swipe Time

Mascara application is where the real magic happens.  Most important application tips:

  1. Swipe Toward the Nose – Instead of just swiping the wand straight up, angle toward your nose to fan out the lashes and cut down on mascara transferring onto the eyelids.  No one likes dealing with that mess.

  2. Base and Blink – Set the wand as far down on your lashes as you can get, right at the base, wiggle it a bit to get mascara on the roots of your lashes, then slowly blink as you move the wand upward and toward your nose in one fluid stroke.

  3. Coat Both Sides – Don’t forget the top side of your lashes!  Once you’ve done the base and blink technique, look down and coat the top of the lashes all the way up to the tips.

Revive Old Mascara with Eye Drops

There always comes that inevitable time when a tube of well-loved mascara turns dry, clumpy and basically unusable.  This is a good excuse to run out and buy another one but if you want to revive the mascara and stretch your money, add a couple squeezes of eye drops to the tube and swirl everything around with the wand.  Voila! Mascara resurrection.

drops

And there you have it, my best mascara tricks.  What is your lash secret weapon?  Let me know!

Self-Tanning Routine and Favorite Products

As I type this post, I see that my lovely little corner of the world is expecting 4-7 inches of snow this weekend. Combine that with the fact that the sun now goes down at 4:30pm and I’m in dire need of a dose of summer.  Enter one of my most treasured beauty rituals: Self-Tanning.

A golden tan can give you a healthy glow and, let’s be real, the whole “If you can’t tone it, tan it!” sentiment is very true.  A good tan helps you look and feel better. Thankfully, self-tanning products have come a LONG way in the past few years, and when these products are combined with a solid pre and post application routine, you can be tan and glowing every day of the year – all without being exposed to damaging UV rays.

Here is my self-tanning routine and favorite products for face and body:

arm

Here’s my tan, disembodied arm

Pre-Tan Application

I typically do my self-tanning routine at night so when I wake up in the morning my tan has darkened and I’m good to go.

The number one key to a streak-free, long-lasting, even tan is to exfoliate pre-application.  You can shell out money for fancy body scrubs that smell like angel kisses and will take off your top layer of skin, or you can do what I do and buy cheap exfoliating shower gloves at the drugstore:

ex gloves

Hop in the shower, squeeze some body wash on these bad boys and scrub your whole body down – especially focus on knees, elbows and ankles as self-tanning products tend to really stick to those areas and can make them develop darker than the rest of your tan.

3

Don’t forget to also exfoliate your face!  My favorite product that I’ve talked about before are the Skin Obsession Microdermabrasion Crystals mixed with whatever cleanser I have in the shower.

Tan Application

Now that you’ve exfoliated the top layer of your skin off (gross but yay!) and you’re out of the shower, it’s time to dry off completely and apply the tan.  I know that your skin is all dry and itchy feeling and you want to dip your entire body in lotion but WAIT, we’ll get there.

If you’re using a mouse or a spray, grab some old/dark-colored towels to lay down on the floor to prevent any stains.  And if you live alone like me or have the house to yourself for an hour, I highly suggest applying your tan in another, cooler temperature room – your bathroom is a humid, hot place after you’ve showered and that environment can double the time it takes your tan to dry.  So if you have the option, spread out some towels in the living room and let’s get down to business:

jergens

I’ve tried quite a few self-tanning products, from very expensive to drugstore, and I can’t recommend this Jergen’s mousse enough.  It’s inexpensive ($10), has a pleasant smell, and gives me natural-looking color that lasts a good 3-5 days.

  • Use gloves and/or a mitt to keep your hands from getting horrifically stained. Apply a few pumps to your mitt, smooth it all over one body part at a time and keep working.  I start at my feet and work upwards but it’s your world, start wherever you want.

gloves and mitt

  • Once you’ve applied the tan all over your body, you may want to use a product specifically made for self-tanning the face. I’ve found in the past that the body tanners do give me great color on my face but they break me out horribly, and tan pimples suck just as much as pale ones.

    Instead, I mix a bit of Olay daily moisturizer with a small amount of Tarte’s Maracuja Face and Body Self Tanner and apply all over my face.  Done.

tarte

Post-Tan Application

The hard part is over!  Now just chill out for a few minutes (Naked! Scandalous!) to let your tan dry.  Once you feel sufficiently dry (10-20 minutes), it’s time to add moisture back into the skin.  I cover myself top to bottom in my favorite lotion of all time – Vaseline Cocoa Radiant.

vaseline

Applying lotion every day will help keep your skin soft and extend the longevity of your tan.  If you want to give your tan an extra boost when it starts to fade several days later, I highly recommend the St. Tropez One Night Only Instant Body Glow Lotion

st tropez

This lotion is pricey but it’s great for giving your tan some extra color, or you if you don’t feel like going through the whole self-tan process described above, apply this for a tan that washes off in your next shower.

And that’s it! Happy Bronzing!

Curly Hair Routine & Favorite Products

When it comes to my hair, I live a lie most of the time.  As I’ve mentioned before, I almost bankrupt myself every month maintaining my dyed blonde hair. I also spend a fair amount of time fighting against my natural curls and beating them into submission with blow-drying, flat ironing and curse words.

But every now and then I say screw it and let the curls fly free.  As any curly girl knows, it takes some product and practice to get your curls to behave and look their best.  Here’s my tried and true curly hair routine and favorite products:

carrie

Photo Credit: fashionista.com
  • Curl Activating Shampoo and Conditioner

Do curl activating shampoos and conditioners really help your curls be the best they can be? I think so.  Is it all a placebo effect and I’m just lighting my money on fire?  Maybe.  Either way, I use the L’Oreal EverCurl Hydracharge Sulfate-Free Shampoo and Conditioner  because I think it gives my curls a little more oomph and makes them soft and shiny.

shampoo

Photo Credit: drugstore.com
  • Thou Shalt Not Use A Towel

Towels might seem all warm and cuddly and non-threatening but rub one on your freshly washed curls and you’re in for trouble and a LOT of frizz.  Instead, use an old, soft cotton T-shirt to blot your hair (don’t rub, don’t you dare rub) and squeeze out the excess water.  The key to frizz-free curls is to touch them as little as possible.

blue

Photo Credit: target.com
  • Define Those Curls

Now we’re getting somewhere.  While my hair is still fairly wet, I scrunch the curls with Paul Mitchell’s Round Trip Curl Definer.  This stuff is great because it’s not a gel but more of a serum that helps separate and define your curls without weighing them down and making them stiff.  Gel + wet curls = crunchy late 80’s Jessie Spano hair and we don’t want that.  What we’re going for is more “Penny Lane in Almost Famous” curls.

PL

Photo Credit: teachmix.com

  • Don’t Touch

This is one of the most important steps: Do nothing.  Walk away.  Do not touch your curls.  Let them air dry for a bit while you put your makeup on or do whatever else your heart desires.

  • Mousse and Style

We’ve reached the home stretch!  Once your hair is almost completely dry, scrunch/carefully comb through a golf ball-sized amount of mousse through your curls.  My go-to is the Aussie Mousse + Leave-In Conditioner because it smells AMAZING and the leave-in conditioner leaves my hair super soft.

mousse

Photo Credit: makeupalley.com

  • Finishing Touches

If you’ve got the time, I highly suggest using a curling iron roughly the size of your curls to define the top layer.  I like to randomly pick small pieces and alternate the direction of the iron so that it looks more natural.  My curls aren’t tightly wound so I stick with an inch or 1.5 inch iron.

iron

Photo Credit: ulta.com

And that’s it! Enjoy your curls 🙂

curls

Tailgating: Makeup, Hair & General Tips

GET UP. IT’S GAME DAY.  Wipe the crust out of your eyes, put on your team colors and grab a beer because we’re talking tailgating.

It’s finally almost fall and that means it’s finally time for football.  With football comes the storied tradition of tailgating and acting a fool pre-game.  And I don’t know about you, but I like to look cute when I’m acting a fool.  So, here are my best tailgating beauty tips.  And if you’re interested in my overall tailgating tips, and you should be, check out the end of this post:

Waterproof Everything

You’ll be sweating to death at the first few games of the season and wiping the snow off your face during the last games.  You need waterproof everything.  Ok, maybe not everything, but at least waterproof mascara and eyeliner. My recommendations: CoverGirl Super Sizer mascara and Maybelline Master Precise Liquid Eyeliner.

CG

Photo Credit: walmart.com

Hair

Tailgating and football games usually involves many hours of standing outside in the elements so why waste time trying to actually style your hair?  You have beer to drink and opposing fans to taunt.  My advice is to braid your hair and or/wear a hat. The braid makes you look all put together and sporty (is that a word?) and the hat reps your team while keeping the sun off your face.  Win-win.

braid

Primer

Similar to Waterproof Everything, you’ll want to use a primer.  Tailgating can be sweaty business and you don’t want all of your makeup to melt off before kickoff.  Put on a layer of primer (with sunscreen!) before the rest of your makeup to give it extra staying power.  I’m a bit of a primer hoarder so I recommend the Benefit Porefessional, Smashbox Photo Finish or L’Oreal Lumi.

 tailgate

Here we see the author in her natural habitat.

General Tailgating Tips

Listen. I’m not a great dancer.  I can’t cook really at all.  I’m pretty terrible at math.  There are a number of things I’m just not good at.

But do you know where I shine?  What I am good at? I am good at tailgating like I was placed on this pale blue dot spinning in the infinite blackness of space for the sole purpose of drinking a cold Miller Lite and eating a hot dog at 10:00am on a crisp Saturday autumn morning.  That’s what I’m good at. (And makeup).

What I’m trying to say is, this is not my first rodeo.  Tailgates can be a tricky mistress so, learn from me:

  • Tip #1
    Start the day with some form of food.
    You can drink a beer or Bloody Mary with this food if you want (and I usually want), but get some food in your stomach before you hop on the booze express.  As the incredibly accurate saying goes – This is a marathon, not a sprint.  You need a base for all of that delicious beer you’re about to drink.  Burger, brat, cheez balls, cold pizza, whatever.  Food.  Eat it.
  • Tip #2
    Drink a few well-placed waters.
    Now, 21 year old Chelsea would’ve rolled her eyes and shotgunned a beer at this tip, but hear older and wiser me out.  Alcohol dehydrates you. Playing beer pong in the sun for 3 hours dehydrates you times a thousand.  If you want to actually make it to the game and enjoy the game, drink some damn water every hour or so.  Your skin and body will thank you the next day.
  • Tip #3
    Take one shot.  Time it impeccably.
    This can, quite literally, make or break your tailgating and game day experience. I’m talking about The Shot.  Laettner style. Take a shot too early in the day and you’re liable to start knocking ‘em back one after another and punching an opposing fan, and we don’t want that.  You want to take your shot (of probably Fireball, let’s be honest) when there isn’t a ton of time left until kickoff.  You want to be pleasantly lifted but still v. together when you take the shot.  It’s the cherry on the sundae and helps you carry your buzz through at least the 3rd quarter.  Savor the shot; use it wisely.

Go Team!

Tips for Maintaining Dyed Blonde Hair

I am not, and never will be, a natural blonde. Everyone knows blondes have more fun and if you know me personally, you know that one of my main priorities in life is having fun at all times.  Thanks to science and bleach, I’ve been having my hair dyed and highlighted blonde for a good 15 years and I honestly don’t know if I’ll ever go back to my natural brunette color.  Blonde just suits me.

However, anyone who regularly colors their hair knows that the process can be expensive, time consuming and very harsh on your hair.  Thankfully, there are a few easy tips and products you can use to maintain bleached/dyed blonde hair and stretch out your money and time between trips to the salon:

  1. Stay near your natural color

This one kind of goes without saying, but, trying to go platinum blonde if you naturally have jet black hair is going to be a very long, very expensive, and probably physically painful process.  We’re talking about bleach here.  That shit does NOT play around and can sting like a thousand wasps are burrowing into your scalp.

curls

My natural color is a fairly light brown so I stick to a honey-colored blonde dye with a half-head of bleach (platinum) highlights thrown in every 3 or 4 months.  Every six weeks I have only the new growth (roots) touched up with the dye and that helps keep the rest of my hair from being colored/damaged more than it needs to be.  Which brings me to my next point…

  1. Condition. Deep condition.

aussie

Bleach and dye are incredibly drying and damaging to the hair. That’s just the way it goes.  You can help slow and repair that damage with weekly deep conditioning treatments.  My absolute favorite is the Aussie 3 Minute Miracle Deep Conditioners.  The bottle says to leave it on for three minutes but I’m a “Go big or go home” kind of person so I typically apply this conditioner post-shampoo, throw a raggedy shower cap over it (sexy!) and let it sit for an hour while I rot my brain with the latest episode of Real Housewives of NYC.

10

Another conditioning product I love and use religiously is the It’s a 10 Blonde Miracle Leave-In Treatment.  This leave-in smells great, protects your hair during heat styling, detangles, enhances shine and helps keep color treated blonde from turning orange and brassy.  This stuff is legit.

  1. Use a purple shampoo

Another ally in the fight against brassiness, purple shampoo helps balance the yellow tones in blonde hair to make them brighter.  John Freida makes a good purple shampoo but I’m cheap and buy the generic Clairol Shimmering Lights Shampoo online or from Sally’s.

purple
Photo credit: thethriftygirlsguide.com

As you can see, this shampoo is extremely purple so a little goes a long way.  If you use it too often or leave it on too long it can actually give your hair a purple tinge.  If that’s your thing, rock on.  If not, only use it once or twice a week.

  1. Don’t wash your hair so often

batiste
Photo credit: berenicebeauty.wordpress.com

This is a tip for really anyone but especially for us bleach blondes.  Unless you’re getting crazy sweaty, there’s no need to wash your hair daily.  Washing every day strips your scalp of its natural oils and when you’re dehydrating your hair with bleach and color, you need all the moisture you can get.  It may take your hair and scalp some time to get used to not being washed every day, but you hair will thank you once it adjusts.  Plus, color won’t fade as fast when you’re not stripping it with shampoo chemicals every day.  Get some dry shampoo (Batiste is my hands-down favorite) and learn to embrace the natural body and shine slightly dirty hair can give you.

Hope this helps all of my other faux-Marilyn Monroe’s out there!

Beauty Tips for When You’ve Been…Overserved

Well, isn’t this just the worst.  You, my friend, have been overserved.  You have a hangover.

Your mouth tastes like (and somehow has the texture of) an old rug soaked in beer.  Your head is bumpin’.  That jerk of a sun is up and you gotta be, too. You likely feel AND look terrible but you’re required to interact with other humans today and want to look less undead.  I’m no miracle worker, but here are some makeup and beauty tips to help lessen the damage:

  1. Shower
    For the love of God, shower. A good drinking session has the power to leave you waking up smelling like a rotting muskrat covered in Doritos so, wash up.  Bonus: The water will wake you up and make you feel better because it is a 100% proven fact that showers help ease the pain of hangovers (based on personal research).  Wash off any remaining makeup from the night before and get that blood pumpin’.
  1. Perfume/Cologne
    Perfume is needed because, well, see above. Now you don’t want to go overboard with this step because an overserved nose is highly susceptible to any smells which can increase the lovely nausea you’re trying to shake.  Stick with a clean, fresh, not too overpowering scent.  This is no time for anything flowery or musky.  We’re just trying to lessen the stank emanating from your body.
  2. Moisturize
    You may think this is the perfect time to just throw every makeup product you own on your face in an attempt to cover the half-dead corpse decaying within and call it a day.  You would be wrong. The first and most important thing you need to do is moisturize!Alcohol dries out the skin something fierce so slather moisturizer on your face (and body, if you can stand up that long) to plump up the skin.  The rubbing motions will get the blood flowing and also help drain the puffiness from under your eyes.

    For extra de-puff power, throw a couple spoons in the freezer for a few minutes.  Once they’re nice and cold, place the spoons over your eyes, lie down for 5 minutes and contemplate why you ever even attempt to drink tequila.

  1. Makeup
    You’re struggling to put sentences together so there’s no way you’re putting on a full face today. Thankfully, just a few products can make a big difference.Use a BB cream or tinted moisturizer as your base.  Don’t waste time with foundation or powder today, you need the hydration and smoothing benefits of a BB cream. Next, skip the eyeshadow.  Dark colors can weigh those tired eyes down even more and make you look worse, so stick to just a bit of eyeliner and lots of mascara to open up the eyes.  Finish up with a glossy or bright lip to fake a fresh-faced look.

    Pro Tip: Use a flesh-colored eyeliner on your lower waterline to cancel out the redness and make eyes look whiter, brighter and less, well, hungover.

  1. Hair
    Let’s be frank – your hair probably looks pretty horrific.  No worries!  Pull that hair up in a high ballerina-style bun.  This serves two crucial functions – you look polished and put together, plus you get a mini face lift. Win.

Now go forth and conquer this day!  (And by “conquer” I mean drag yourself out the door and begin counting down the seconds until you can reunite with your bed.)

Quick & Easy Makeup for Work

There are few things that can rival my love of makeup, but one thing that can is sleeping.  I’ve always been a world-champion sleeper and thoroughly enjoy sleeping in until the absolute last minute before it’s critical that I get up and start the day.

Like many people, I have to get up early in the morning to go to work.  How do I combine my true loves of sleeping and having enough time to put my makeup on?  Easy.  I keep my look simple, but impactful, and only focus on three things:

  1. Skin

A full face of foundation, contouring and powder? Ain’t nobody got time for that in the morning.  Instead, I use a flat top kabuki brush to apply Tarte Full Coverage Powder Foundation all over my face.  This foundation gives excellent coverage and helps control shine, no need for extra powder.  I’ll also quickly throw some Maybelline Fit Me concealer under my eyes to camouflage any darkness or puffiness, and I’m set.

  1. Eyes

If you can spare 1 minute, apply some light brown eyeshadow to your crease, but feel free to skip this if you want or are really pressed for time.  Instead, focus on your lashes and your brows.  Shaped and quickly filled-in brows make the face look “finished” (even if that face was just drooling onto a pillow 4 minutes ago).  A couple coats of mascara will help eyes look more open and awake.

  1. Lips

This is the key.  Wear a bright lipstick or balm.  My go-to color is red (in the photos below I’m wearing the Revlon Balm Stain in 045 Romantic) because I think it makes my teeth look crazy white, but a vivid pink also does the trick.  A bright lip pulls everything together, gives your face a pop of color and can distract from tired-looking eyes.

               red 1               red 2

(Confession: I have blush on, too)

This face takes 5 minutes max. It’s my go-to look on Monday mornings when I hit snooze once or thrice.  Plus, it’s appropriate for work, school….anything, really.  Hope you enjoy!