Tailgating: Makeup, Hair & General Tips

GET UP. IT’S GAME DAY.  Wipe the crust out of your eyes, put on your team colors and grab a beer because we’re talking tailgating.

It’s finally almost fall and that means it’s finally time for football.  With football comes the storied tradition of tailgating and acting a fool pre-game.  And I don’t know about you, but I like to look cute when I’m acting a fool.  So, here are my best tailgating beauty tips.  And if you’re interested in my overall tailgating tips, and you should be, check out the end of this post:

Waterproof Everything

You’ll be sweating to death at the first few games of the season and wiping the snow off your face during the last games.  You need waterproof everything.  Ok, maybe not everything, but at least waterproof mascara and eyeliner. My recommendations: CoverGirl Super Sizer mascara and Maybelline Master Precise Liquid Eyeliner.

CG

Photo Credit: walmart.com
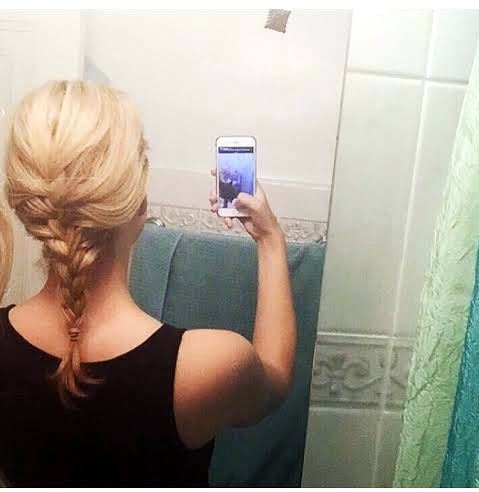
Hair

Tailgating and football games usually involves many hours of standing outside in the elements so why waste time trying to actually style your hair?  You have beer to drink and opposing fans to taunt.  My advice is to braid your hair and or/wear a hat. The braid makes you look all put together and sporty (is that a word?) and the hat reps your team while keeping the sun off your face.  Win-win.

braid

Primer

Similar to Waterproof Everything, you’ll want to use a primer.  Tailgating can be sweaty business and you don’t want all of your makeup to melt off before kickoff.  Put on a layer of primer (with sunscreen!) before the rest of your makeup to give it extra staying power.  I’m a bit of a primer hoarder so I recommend the Benefit Porefessional, Smashbox Photo Finish or L’Oreal Lumi.

 tailgate

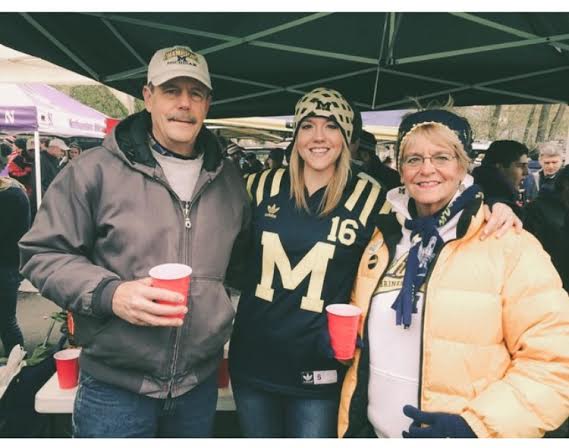
Here we see the author in her natural habitat.

General Tailgating Tips

Listen. I’m not a great dancer.  I can’t cook really at all.  I’m pretty terrible at math.  There are a number of things I’m just not good at.

But do you know where I shine?  What I am good at? I am good at tailgating like I was placed on this pale blue dot spinning in the infinite blackness of space for the sole purpose of drinking a cold Miller Lite and eating a hot dog at 10:00am on a crisp Saturday autumn morning.  That’s what I’m good at. (And makeup).

What I’m trying to say is, this is not my first rodeo.  Tailgates can be a tricky mistress so, learn from me:

  • Tip #1
    Start the day with some form of food.
    You can drink a beer or Bloody Mary with this food if you want (and I usually want), but get some food in your stomach before you hop on the booze express.  As the incredibly accurate saying goes – This is a marathon, not a sprint.  You need a base for all of that delicious beer you’re about to drink.  Burger, brat, cheez balls, cold pizza, whatever.  Food.  Eat it.
  • Tip #2
    Drink a few well-placed waters.
    Now, 21 year old Chelsea would’ve rolled her eyes and shotgunned a beer at this tip, but hear older and wiser me out.  Alcohol dehydrates you. Playing beer pong in the sun for 3 hours dehydrates you times a thousand.  If you want to actually make it to the game and enjoy the game, drink some damn water every hour or so.  Your skin and body will thank you the next day.
  • Tip #3
    Take one shot.  Time it impeccably.
    This can, quite literally, make or break your tailgating and game day experience. I’m talking about The Shot.  Laettner style. Take a shot too early in the day and you’re liable to start knocking ‘em back one after another and punching an opposing fan, and we don’t want that.  You want to take your shot (of probably Fireball, let’s be honest) when there isn’t a ton of time left until kickoff.  You want to be pleasantly lifted but still v. together when you take the shot.  It’s the cherry on the sundae and helps you carry your buzz through at least the 3rd quarter.  Savor the shot; use it wisely.

Go Team!

Tips for Maintaining Dyed Blonde Hair

I am not, and never will be, a natural blonde. Everyone knows blondes have more fun and if you know me personally, you know that one of my main priorities in life is having fun at all times.  Thanks to science and bleach, I’ve been having my hair dyed and highlighted blonde for a good 15 years and I honestly don’t know if I’ll ever go back to my natural brunette color.  Blonde just suits me.

However, anyone who regularly colors their hair knows that the process can be expensive, time consuming and very harsh on your hair.  Thankfully, there are a few easy tips and products you can use to maintain bleached/dyed blonde hair and stretch out your money and time between trips to the salon:

  1. Stay near your natural color

This one kind of goes without saying, but, trying to go platinum blonde if you naturally have jet black hair is going to be a very long, very expensive, and probably physically painful process.  We’re talking about bleach here.  That shit does NOT play around and can sting like a thousand wasps are burrowing into your scalp.

curls

My natural color is a fairly light brown so I stick to a honey-colored blonde dye with a half-head of bleach (platinum) highlights thrown in every 3 or 4 months.  Every six weeks I have only the new growth (roots) touched up with the dye and that helps keep the rest of my hair from being colored/damaged more than it needs to be.  Which brings me to my next point…

  1. Condition. Deep condition.

aussie

Bleach and dye are incredibly drying and damaging to the hair. That’s just the way it goes.  You can help slow and repair that damage with weekly deep conditioning treatments.  My absolute favorite is the Aussie 3 Minute Miracle Deep Conditioners.  The bottle says to leave it on for three minutes but I’m a “Go big or go home” kind of person so I typically apply this conditioner post-shampoo, throw a raggedy shower cap over it (sexy!) and let it sit for an hour while I rot my brain with the latest episode of Real Housewives of NYC.

10

Another conditioning product I love and use religiously is the It’s a 10 Blonde Miracle Leave-In Treatment.  This leave-in smells great, protects your hair during heat styling, detangles, enhances shine and helps keep color treated blonde from turning orange and brassy.  This stuff is legit.

  1. Use a purple shampoo

Another ally in the fight against brassiness, purple shampoo helps balance the yellow tones in blonde hair to make them brighter.  John Freida makes a good purple shampoo but I’m cheap and buy the generic Clairol Shimmering Lights Shampoo online or from Sally’s.

purple
Photo credit: thethriftygirlsguide.com

As you can see, this shampoo is extremely purple so a little goes a long way.  If you use it too often or leave it on too long it can actually give your hair a purple tinge.  If that’s your thing, rock on.  If not, only use it once or twice a week.

  1. Don’t wash your hair so often

batiste
Photo credit: berenicebeauty.wordpress.com

This is a tip for really anyone but especially for us bleach blondes.  Unless you’re getting crazy sweaty, there’s no need to wash your hair daily.  Washing every day strips your scalp of its natural oils and when you’re dehydrating your hair with bleach and color, you need all the moisture you can get.  It may take your hair and scalp some time to get used to not being washed every day, but you hair will thank you once it adjusts.  Plus, color won’t fade as fast when you’re not stripping it with shampoo chemicals every day.  Get some dry shampoo (Batiste is my hands-down favorite) and learn to embrace the natural body and shine slightly dirty hair can give you.

Hope this helps all of my other faux-Marilyn Monroe’s out there!

Beauty Tips for When You’ve Been…Overserved

Well, isn’t this just the worst.  You, my friend, have been overserved.  You have a hangover.

Your mouth tastes like (and somehow has the texture of) an old rug soaked in beer.  Your head is bumpin’.  That jerk of a sun is up and you gotta be, too. You likely feel AND look terrible but you’re required to interact with other humans today and want to look less undead.  I’m no miracle worker, but here are some makeup and beauty tips to help lessen the damage:

  1. Shower
    For the love of God, shower. A good drinking session has the power to leave you waking up smelling like a rotting muskrat covered in Doritos so, wash up.  Bonus: The water will wake you up and make you feel better because it is a 100% proven fact that showers help ease the pain of hangovers (based on personal research).  Wash off any remaining makeup from the night before and get that blood pumpin’.
  1. Perfume/Cologne
    Perfume is needed because, well, see above. Now you don’t want to go overboard with this step because an overserved nose is highly susceptible to any smells which can increase the lovely nausea you’re trying to shake.  Stick with a clean, fresh, not too overpowering scent.  This is no time for anything flowery or musky.  We’re just trying to lessen the stank emanating from your body.
  2. Moisturize
    You may think this is the perfect time to just throw every makeup product you own on your face in an attempt to cover the half-dead corpse decaying within and call it a day.  You would be wrong. The first and most important thing you need to do is moisturize!Alcohol dries out the skin something fierce so slather moisturizer on your face (and body, if you can stand up that long) to plump up the skin.  The rubbing motions will get the blood flowing and also help drain the puffiness from under your eyes.

    For extra de-puff power, throw a couple spoons in the freezer for a few minutes.  Once they’re nice and cold, place the spoons over your eyes, lie down for 5 minutes and contemplate why you ever even attempt to drink tequila.

  1. Makeup
    You’re struggling to put sentences together so there’s no way you’re putting on a full face today. Thankfully, just a few products can make a big difference.Use a BB cream or tinted moisturizer as your base.  Don’t waste time with foundation or powder today, you need the hydration and smoothing benefits of a BB cream. Next, skip the eyeshadow.  Dark colors can weigh those tired eyes down even more and make you look worse, so stick to just a bit of eyeliner and lots of mascara to open up the eyes.  Finish up with a glossy or bright lip to fake a fresh-faced look.

    Pro Tip: Use a flesh-colored eyeliner on your lower waterline to cancel out the redness and make eyes look whiter, brighter and less, well, hungover.

  1. Hair
    Let’s be frank – your hair probably looks pretty horrific.  No worries!  Pull that hair up in a high ballerina-style bun.  This serves two crucial functions – you look polished and put together, plus you get a mini face lift. Win.

Now go forth and conquer this day!  (And by “conquer” I mean drag yourself out the door and begin counting down the seconds until you can reunite with your bed.)

Skin Care 101: My Routine and Favorite Products

I have a confession.  Up until a couple years ago, I had no skin care routine whatsoever. Zero. Maybe I’d splash some water on my face in the morning and use whatever soap in the shower to do a mediocre job of washing off my makeup in the evening, but that was it.

I’m sure it comes as no surprise that my skin was dull with an uneven tone, fine lines were starting to form and, due to my naturally oily skin (thanks, Mom!), I had my share of acne.  Thankfully, I’ve learned a lot since then and now I actually get compliments on my skin, which still throws me off from time to time.  Take my advice and don’t wait 28 years to start caring for your face!

me
This is my face. And maybe a filter.

There are three basic steps to skin care: Cleansing, Exfoliating and Moisturizing.  Doesn’t sound too bad, right? Here is my current skin care routine and favorite products:

  1. Makeup Removal 

 1

I’m an evening shower person so we’ll start the routine with makeup removal. Removing all of your makeup before cleansing is a crucial step on the road to great skin. Before getting in the shower, I take off my makeup with a Neutrogena makeup remover wipe. The CVS brand of these wipes is great, too (and cheaper).  If I have some heavy-duty eye makeup on, I’ll soak a cotton ball with Neutrogena eye makeup remover and gently rub everything off.

  1. Cleansing and Exfoliating 

  2

I keep a rotation of several cleansers in the shower but usually mix together my all-time favorites of Cetaphil and the Garnier Blackhead Eliminating Scrub for Oily Skin.  Cetaphil is super mild and helps remove any remaining bits of makeup the wipe might have missed while the Garnier scrub removes dead skin and is gentle enough to use every day.  Plus, the charcoal in the scrub helps control acne and oily skin because, science.

3

Once or twice a week I’ll mix together a pump of Cetaphil with a small amount of my secret weapon: Skin Obsession Microdermabrasion Crystals.  These crystals are incredibly finely milled and a minute or two of rubbing this mixture all over your face will leave your skin baby soft and radiant.   Exfoliating is KEY in keeping skin soft, generating new skin cells and evening out skin tone. A smooth, even canvas gives you a fantastic base for applying makeup.  Exfoliating is also a necessity for keeping “mature” a.k.a over 30 skin, like mine, all glowy and youthful.

  1. Toning & Anti-Aging

4

Toner seems to be one of those things that people are on the fence about when it comes to skin care.  Do I think it’s a huge factor? No. Do I think it helps in my fight against oily skin? Yep. Once my skin is all cleansed, exfoliated and I’m out of the shower, I’ll soak a cotton ball in toner and wipe it all over my face.  Done.

Next it’s time for anti-aging. I’ve been using the Avene Retrinal 0.1 Cream ever since my dermatologist recommended it two years ago when I asked her what would help slow time from marching across my face.  The price is a little steep but you only need to use a pea-sized amount each night, so a tube will last months.  I apply this all over my face and neck. It has never made me break out, it doesn’t give that lovely sting that other retinol products can have and I think it’s done wonders for evening out my skin tone and plumping everything up a bit.  I highly recommend it.

While letting the Retrinal sink in and do its thing, I’ll apply a dot of Epiduo to any pimple that might be starting to show up and this stops it in its tracks.  I’m fairly certain that Epiduo is prescription only so ask your dermatologist for a sample.  It’s strong, effective stuff and can be very drying, so use a tiny dot only on the spot itself or you’ll risk the skin around it becoming dry and flaky.

  1. Moisturizing 

5

Anti-aging and acne prevention products can dry out the skin, so it’s time to put that moisture back in.  I like to use a combination of the classic Olay Night Cream with a few drops of Tarte Maracuja Oil mixed in. Yes, I have oily skin and yes, I put an oil on my face and I genuinely believe it’s one of the most important steps in my routine.  Maracuja oil has many benefits and is loaded with Vitamin C to give you a brighter, firmer complexion.  This oil is not cheap but when you only use 2-3 drops a day, it’s going to last.  I can’t say enough good things about it (although it smells a bit like french fry grease, but…who doesn’t love fries?).  For daytime moisture, I use the Olay Complete Moisturizer with SPF 15 after cleansing and before applying makeup.

Last, but certainly not least, I pat Olay Eye Lifting Serum underneath and around my eyes.

And that’s it!  This might sound like a ton of products and a lot of steps, but once I got into the habit, I got it down to a science and it only takes me 5-7 minutes, tops.

  1. Optional Step: Face Masks 

6

I don’t lead a particularly taxing life, but I still live by the “Treat Yo Self” motto.  Part of that treating is face masks.  I loooove them.  And you should, too, because they’re inexpensive, helpful for a range of skin issues and you’ll feel like a queen (or king, no judgement) waiting to be fed grapes while you lay around with your mask on.

Once or twice a week I’ll use one of the following masks, depending on what my skin’s doing or needing.  Bonus: All Freeman masks are inexpensive and sold at every drugstore:

  • Freeman Oatmeal & Avocado Clay Mask gets all the gunk out of your pores, leaving your skin extra clean and smooth. I like to use this mask at the end of the weekend since I’ve typically been wearing a lot of makeup and acting a fool for the past few days, so I need that deep clean.
  • Freeman Peel-Off Cucumber Mask is an old school, peel-off cucumber mask. Truthfully I just love this one for the Patrick Bateman-esque style of peeling the mask off once it’s all dry, but it does have actual skin smoothing and impurity-removing benefits.
  • Freeman Charcoal & Black Sugar Polishing Mask is a must for my fellow oily skin people because it contains our friend charcoal. This isn’t a mask exactly, but more a yummy-smelling paste.  Spread it all over your face, let it sit for a couple minutes, rub it all around your face for a minute or two, wash it off and voila! Glowing, smooth skin is yours.

My number one skin care tip? Be consistent. A solid routine and great products won’t help much if you’re only using them sporadically.  Carve out a couple minutes in your day to take care of your skin and I promise, your face will thank you for it.