Mascara Tips & Tricks

My oldest and truest love in the makeup world is mascara. It’s my “desert island” product. I have a minimum of 5 tubes in my makeup stash at any given time (stay tuned for my episode of Hoarders). I can’t live without it. Okay I could…but I don’t want to.  Why?  Because mascara makes a huge difference, especially for hooded eye folks like me, and there’s just something ultra feminine and Marilyn Monroe-esque about having long, fluttery lashes.  

Over my many years of mascara wearing and beauty researching, I’ve learned some helpful tips and tricks to get the most out of my lashes and I’m happy to share those tricks with you.  Here we go:

me
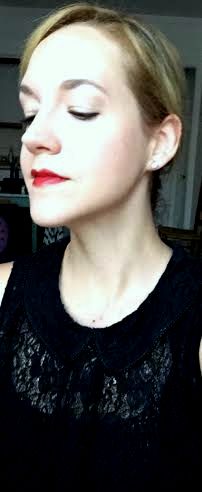
Right eye brought to you by the power of mascara; facial expression brought to you by seasonal allergies.
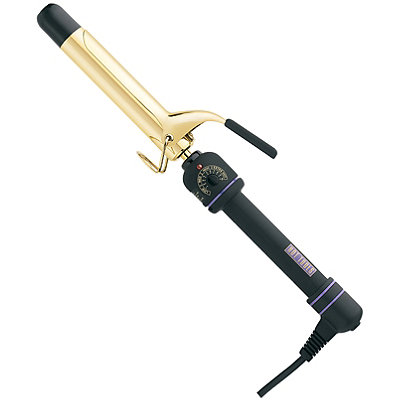
Heat It Up

It goes without saying that a good lash curler plays an integral part in making your lashes look their best. So before you start applying any makeup, throw your lash curler and/or mascara tube in your bra. Yes, you read that correctly.  

Heating up the curler helps lashes hold the curl longer while heating up the mascara softly melts the formula and leads to easier, smoother, less clumpy application.  Some beauty gurus advise heating up the curler with a hairdryer but I’m far too lazy for that and prefer to just stick my curler in my bra for a few minutes and let body heat do its thing.  Works just as well and really confuses anyone who happens to be watching you apply your face.

curler

Looks weird, works well

Line the Waterline

The majority of us aren’t #blessed with thick lashes but luckily it’s easy to fake them by lining the upper waterline.  This trick isn’t for the faint of heart because you’ll be putting a pointy object dangerously close to your eyeball but it really does make a world of difference:

tightline

Photo Credit: beautylish.com

Run a waterproof black or dark brown liner on that tiny strip of skin to fill in the gaps between lashes and give you a more cohesive, full lash look.

Use a Lash Primer

Not necessarily a must-have for every day, but when you really want to make lashes look extra long, thick and fabulous, apply a lash primer before mascara.  My favorite is the Benefit They’re Real Tinted Lash Primer:

benefit

Lash primer is also great for “no makeup” makeup looks, giving just enough color and length to make eyes look more open and awake without looking made up.

Swipe Time

Mascara application is where the real magic happens.  Most important application tips:

  1. Swipe Toward the Nose – Instead of just swiping the wand straight up, angle toward your nose to fan out the lashes and cut down on mascara transferring onto the eyelids.  No one likes dealing with that mess.

  2. Base and Blink – Set the wand as far down on your lashes as you can get, right at the base, wiggle it a bit to get mascara on the roots of your lashes, then slowly blink as you move the wand upward and toward your nose in one fluid stroke.

  3. Coat Both Sides – Don’t forget the top side of your lashes!  Once you’ve done the base and blink technique, look down and coat the top of the lashes all the way up to the tips.

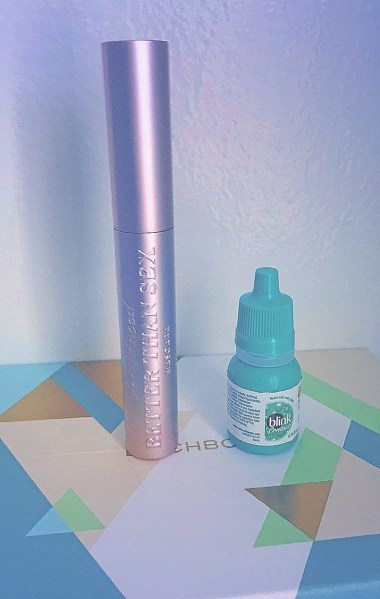
Revive Old Mascara with Eye Drops

There always comes that inevitable time when a tube of well-loved mascara turns dry, clumpy and basically unusable.  This is a good excuse to run out and buy another one but if you want to revive the mascara and stretch your money, add a couple squeezes of eye drops to the tube and swirl everything around with the wand.  Voila! Mascara resurrection.

drops

And there you have it, my best mascara tricks.  What is your lash secret weapon?  Let me know!

Review: Aztec Secret Indian Healing Clay Mask


aztec mask

I’m back, it’s a new year and I have a new favorite face mask.  And this product couldn’t have come at a better time.  I won’t bore you with the gory details but I’ve been sick for roughly the last month (but am finally almost better, yay!) and when my body isn’t feeling well, my skin likes to go absolutely insane.  Not fun.

But there are perks to spending hours in bed feeling like garbage. The universe smiled upon me and I fell down the Amazon beauty reviews rabbit hole and discovered the immensely popular Aztec Indian Healing Clay.  With 4.5/5 stars and over 7,000 reviews I knew this stuff had to be good, but now I’m convinced this one pound tub of dirt has actual magical properties.

So what’s so great about this stuff?  Here are the basics, per Amazon:

  • World’s most powerful facial
  • Deep pore cleaning
  • 100% natural calcium bentonite clay
  • Does not contain: additives, fragrances, animal products


Az1

                 Photo credit: inhautepursuit.com

They forgot to mention that it’s cheap!  A one pound tub will set you back $9, and when you only need one tablespoon per mask, it’s going to last you a loooong time.

Now let’s get down to business.  Here’s how to make the mask:

Az2

        Photo credit: labmuffin.com

You’ll need the clay, a non-metal bowl and spoon and apple cider vinegar.  All of the Amazon faithful suggested Bragg’s Raw Organic Apple Cider Vinegar so that’s what I’ve got.  It smells a bit like rotting apples but hey, it works.

A couple tips before you mix your mask:

  1. Put your hair up or out of your face because, duh.
  2. Eat or drink something if you want because once this baby is on your face, you can’t eat/talk/drink/smile for a good 20-30 minutes. That’s how intensely this mask dries and pulls the junk out of your face.

Once that’s out of the way it’s time to get started. Mix clay with equal part of raw apple cider vinegar (I use 1 tablespoon of each) in a non-metal bowl. Stir the mixture into a smooth paste.  Apply all over the face.  You should look something like this:

Az3

    Photo credit: uk.pintrest.com

Now the fun part begins.  As this mask dries, you will feel your face pulsate like crazy.  This is good.  Don’t be scared.

The mask will become very tight while it dries and hardens.  If you have oily skin like me, keep the mask on for 30 minutes.  Normal and more sensitive skin can get away with 10-20 minutes.

Pro Tip: While your mask dries, take advantage of your green face and channel your inner Jim Carrey.  I suggest dancing around to this song:

Once enough time has gone by and your mask is dry, soak a washcloth in warm water and lay it over your face for a minute or two to begin loosening everything up.  You don’t want to try to start washing it off right away or the chips of mud will clog your drain and no one wants that.

Apply a nice, heavy moisturizer post-facial.  I usually do my masks at night in the bathtub with a glass of wine I drink through a straw and follow up with the Olay Classic Night Cream.
Az4

Photo credit: amazon.com

You’ll notice that your face is very red after the mask is off but this is normal and will go away in 30-ish minutes.  You’ll probably also notice that your face is beyond smooth and soft, and that’s just one of the benefits.  The others include:

  • Smaller pores and cleaned-out blackheads
  • Reduction in excess oil production
  • Elimination of acne. Honestly, I have not had a spot since using this mask 2-3x per week for the past month and a half.  And that, my friends, is a goddamn miracle.
  • Softening of fine lines and wrinkles
  • Skin tone is more even, rough patches are smoothed
  • Glowing skin like the light of a thousand suns

In short, this tub of clay is the real deal.  It’s definitely worth the money and I’m excited to try other uses for it – hair masks, foot soaks, you name it.  If you’re a fan of face masks or just want to give your skin a detox to start 2016 off right, I very highly recommend picking up some Aztec Healing Clay.

10 Songs to Get You Through Every Breakup Stage

Death, taxes, breakups.  They’re all inevitable.  It’s a human rite of passage to have your heart blown to pieces by another person – usually a person who, once upon a time, you thought was the absolute greatest thing in the entire universe.  But now it’s over, and it sucks.  Shit happens.

It doesn’t matter if you did the dumping or you were dumped – the general feeling of terribleness may follow you around for quite awhile.  Thankfully, music can assist with the healing process and help you work through those emotions, let out any anger and eventually move the hell on. I’ve put together a playlist to let you cry it out at the beginning and ultimately rise from the ashes like the majestic phoenix of perfection that you are.

There are many stages to post-breakup ~*fEeLiNgS*~ so let’s start at the beginning:
Stage One: Freshly Dumped – No One Cheated

Stage One sans infidelity is characterized by lots and lots of sadness.  Everything reminds you of your former boo.  You’re probably going through infinite amounts of ice cream, wine and Kleenex so turn on this song (or watch the video if you want to cry along with Sinead) and let it all out:

Nothing Compares 2 U – Sinead O’Connor


Stage One – Part One: Freshly Dumped – That Asshole Cheated

Stage One with infidelity thrown in is a whole other animal. How? What? Why? But? Her? Him?  You may still be in shock and trying to process what the hell just happened.  Enter Mary J. Blige:

Not Gon Cry – Mary J. Blige

Mary is here to remind you not to cry – don’t give that jerk the satisfaction of your tears. You’re fabulous.  Keep it movin’.
Stage One – Part Two: That Asshole Cheated – Anger Edition

You’ve had some time to think about this whole mess and wow, are you mad.  You’re seeing red.  “Pissed” doesn’t quite do your feelings justice.  You want to bust the windows out of his damn car.
Now I don’t suggest going out and actually committing said crime (although it would feel soooo good). Instead, crank up these jams:

Bust Your Windows – Jazmine Sullivan


It’s Not Right, But It’s Okay – Whitney Houston


Stage Two – Wallowing and Acceptance

Well, everything still sucks, but not as much.  You’ve come to terms with the fact that the relationship is over and you’re feeling a bit blah and numb.  This is the laid-back wallow stage where you process what went wrong and hopefully learn from the relationship.  Stage Two music is softer, quieter, more introspective.  This stage might also last you a good bit of time so I’ll give you two songs to help you through:

Almost Doesn’t Count – Brandy

Head back to the late 90s with Brandy, or head back even later to 1965 and let Johnny Cash express your feels:

Don’t Think Twice, It’s Alright – Johnny Cash

Stage Three – Back and Better Than Ever

You’ve had time to be sad, angry and numb.  And you know what?  You’re good now.  No, you’re great. Awesome.  You’re ready to get back on the proverbial horse and show yourself off to the world.

But first – some music to get your mind right and prepare you for re-entrance to the dating scene.
My suggestions:

Migrate – Mariah Carey


Freakum Dress – Beyonce


How To Be A Heartbreaker – Marina and the Diamonds


Miss Movin’ On – Fifth Harmony


You did it!  You survived the breakup.  Now get back out there so you can do it all over again.

How to be 30 and Single

When you’re single in your 20s, it’s assumed that you’re having the time of your life and in no mood to settle down.  When you’re single at 30, it’s assumed that the world is no longer your oyster, you’ve begun collecting cats and spend your time staring off into the abyss waiting and hoping for a potential mate to come along.

I’m here to tell you that being 30 and single is not the end of the world. In fact, it can be, dare I say it…enjoyable.  Like everything in life, there are good parts and bad parts about being single at this age. The bad parts are things like being stuck at the kid’s table for Thanksgiving dinner; the good parts being enjoying ample free time, meeting new people and sprawling across your bed with ALL of the covers.

While I’m certainly not the authority or a certified expert on how to be single (it’s different for everyone), I have enough experience to know what works for me.  So, here are my three best suggestions on how to make the most of it:

Be prepared for The Questions

Yes, The Questions can be annoying and frustrating.  It seems that everyone wants to know the answer to the million dollar question – Why/How are you single? This is inevitably followed up by the asker listing a litany of reasons why you shouldn’t be single – you’re attractive, you’re intelligent, you’re fun, etc.  People may think they’re being helpful or flattering when listing these reasons but sometimes it can leave you later saying to yourself “Yeah, why the hell am I still single? What’s wrong with me? What am I doing wrong?” when really, you haven’t done anything wrong.  You’re just not in a relationship right now. Point blank.

My advice is to take these questions in stride.  It may seem odd but I find having a stock answer helps.  I tend to go with “I haven’t found the right guy yet but he’s out there.  I’m enjoying myself in the meantime.” That response usually shuts down the questions (and the pity party) and hopefully allows you to change the subject to another topic, if you’d like.  I try to remind myself that, depending on the setting, I may be one of only a few single people in attendance, and being different will inevitably make people curious and want to ask questions.


Enjoy It

So often the “single” label is looked upon with pity, disdain and as a problem that needs to be fixed.  But there is another side to being single that needs to be talked about – the side that I like to call Do Whatever The F**K You Want.  Want to spend the day at the beach reading celebrity gossip magazines? Go for it. Want to listen to your favorite songs as loud as possible and have a dance party in your apartment on a Tuesday? I feel you, and I raise my glass of wine to you.

The joy and freedom that come with being single should never be overlooked or taken for granted.  Use this time to do the things that you want to do, things that you may not have the time, energy or money to do a few years down the road.  Pick up new hobbies, read more books, spend time with friends and family or work on yourself. Do whatever it is that makes you feel good.  Being single isn’t a prison sentence that needs to be served.  It’s an opportunity to expand your life.


Love Yourself

In the immortal words of RuPaul, “If you can’t love yourself, how in the hell are you going to love somebody else?”  I know, I know.  It all sounds cheesy but it actually is true – we accept the love we think we deserve and we attract people who mirror how we feel about ourselves.

You may not have a partner at the moment but you have yourself, and really, that’s the only person you can be certain you’ll ever have in this life.  You don’t need to wait for another person to come along to make you feel worthy of being loved. Treat yourself well and take care of yourself in the ways you want to be treated, and you’ll find that you’re ready and able to accept the love of a great partner heading your way.

*Photo Credit: thesinglewomansguide.com

Curly Hair Routine & Favorite Products

When it comes to my hair, I live a lie most of the time.  As I’ve mentioned before, I almost bankrupt myself every month maintaining my dyed blonde hair. I also spend a fair amount of time fighting against my natural curls and beating them into submission with blow-drying, flat ironing and curse words.

But every now and then I say screw it and let the curls fly free.  As any curly girl knows, it takes some product and practice to get your curls to behave and look their best.  Here’s my tried and true curly hair routine and favorite products:

carrie

Photo Credit: fashionista.com
  • Curl Activating Shampoo and Conditioner

Do curl activating shampoos and conditioners really help your curls be the best they can be? I think so.  Is it all a placebo effect and I’m just lighting my money on fire?  Maybe.  Either way, I use the L’Oreal EverCurl Hydracharge Sulfate-Free Shampoo and Conditioner  because I think it gives my curls a little more oomph and makes them soft and shiny.

shampoo

Photo Credit: drugstore.com
  • Thou Shalt Not Use A Towel

Towels might seem all warm and cuddly and non-threatening but rub one on your freshly washed curls and you’re in for trouble and a LOT of frizz.  Instead, use an old, soft cotton T-shirt to blot your hair (don’t rub, don’t you dare rub) and squeeze out the excess water.  The key to frizz-free curls is to touch them as little as possible.

blue

Photo Credit: target.com
  • Define Those Curls

Now we’re getting somewhere.  While my hair is still fairly wet, I scrunch the curls with Paul Mitchell’s Round Trip Curl Definer.  This stuff is great because it’s not a gel but more of a serum that helps separate and define your curls without weighing them down and making them stiff.  Gel + wet curls = crunchy late 80’s Jessie Spano hair and we don’t want that.  What we’re going for is more “Penny Lane in Almost Famous” curls.

PL

Photo Credit: teachmix.com

  • Don’t Touch

This is one of the most important steps: Do nothing.  Walk away.  Do not touch your curls.  Let them air dry for a bit while you put your makeup on or do whatever else your heart desires.

  • Mousse and Style

We’ve reached the home stretch!  Once your hair is almost completely dry, scrunch/carefully comb through a golf ball-sized amount of mousse through your curls.  My go-to is the Aussie Mousse + Leave-In Conditioner because it smells AMAZING and the leave-in conditioner leaves my hair super soft.

mousse

Photo Credit: makeupalley.com

  • Finishing Touches

If you’ve got the time, I highly suggest using a curling iron roughly the size of your curls to define the top layer.  I like to randomly pick small pieces and alternate the direction of the iron so that it looks more natural.  My curls aren’t tightly wound so I stick with an inch or 1.5 inch iron.

iron

Photo Credit: ulta.com

And that’s it! Enjoy your curls 🙂

curls

Tailgating: Makeup, Hair & General Tips

GET UP. IT’S GAME DAY.  Wipe the crust out of your eyes, put on your team colors and grab a beer because we’re talking tailgating.

It’s finally almost fall and that means it’s finally time for football.  With football comes the storied tradition of tailgating and acting a fool pre-game.  And I don’t know about you, but I like to look cute when I’m acting a fool.  So, here are my best tailgating beauty tips.  And if you’re interested in my overall tailgating tips, and you should be, check out the end of this post:

Waterproof Everything

You’ll be sweating to death at the first few games of the season and wiping the snow off your face during the last games.  You need waterproof everything.  Ok, maybe not everything, but at least waterproof mascara and eyeliner. My recommendations: CoverGirl Super Sizer mascara and Maybelline Master Precise Liquid Eyeliner.

CG

Photo Credit: walmart.com

Hair

Tailgating and football games usually involves many hours of standing outside in the elements so why waste time trying to actually style your hair?  You have beer to drink and opposing fans to taunt.  My advice is to braid your hair and or/wear a hat. The braid makes you look all put together and sporty (is that a word?) and the hat reps your team while keeping the sun off your face.  Win-win.

braid

Primer

Similar to Waterproof Everything, you’ll want to use a primer.  Tailgating can be sweaty business and you don’t want all of your makeup to melt off before kickoff.  Put on a layer of primer (with sunscreen!) before the rest of your makeup to give it extra staying power.  I’m a bit of a primer hoarder so I recommend the Benefit Porefessional, Smashbox Photo Finish or L’Oreal Lumi.

 tailgate

Here we see the author in her natural habitat.

General Tailgating Tips

Listen. I’m not a great dancer.  I can’t cook really at all.  I’m pretty terrible at math.  There are a number of things I’m just not good at.

But do you know where I shine?  What I am good at? I am good at tailgating like I was placed on this pale blue dot spinning in the infinite blackness of space for the sole purpose of drinking a cold Miller Lite and eating a hot dog at 10:00am on a crisp Saturday autumn morning.  That’s what I’m good at. (And makeup).

What I’m trying to say is, this is not my first rodeo.  Tailgates can be a tricky mistress so, learn from me:

  • Tip #1
    Start the day with some form of food.
    You can drink a beer or Bloody Mary with this food if you want (and I usually want), but get some food in your stomach before you hop on the booze express.  As the incredibly accurate saying goes – This is a marathon, not a sprint.  You need a base for all of that delicious beer you’re about to drink.  Burger, brat, cheez balls, cold pizza, whatever.  Food.  Eat it.
  • Tip #2
    Drink a few well-placed waters.
    Now, 21 year old Chelsea would’ve rolled her eyes and shotgunned a beer at this tip, but hear older and wiser me out.  Alcohol dehydrates you. Playing beer pong in the sun for 3 hours dehydrates you times a thousand.  If you want to actually make it to the game and enjoy the game, drink some damn water every hour or so.  Your skin and body will thank you the next day.
  • Tip #3
    Take one shot.  Time it impeccably.
    This can, quite literally, make or break your tailgating and game day experience. I’m talking about The Shot.  Laettner style. Take a shot too early in the day and you’re liable to start knocking ‘em back one after another and punching an opposing fan, and we don’t want that.  You want to take your shot (of probably Fireball, let’s be honest) when there isn’t a ton of time left until kickoff.  You want to be pleasantly lifted but still v. together when you take the shot.  It’s the cherry on the sundae and helps you carry your buzz through at least the 3rd quarter.  Savor the shot; use it wisely.

Go Team!

Tips for Maintaining Dyed Blonde Hair

I am not, and never will be, a natural blonde. Everyone knows blondes have more fun and if you know me personally, you know that one of my main priorities in life is having fun at all times.  Thanks to science and bleach, I’ve been having my hair dyed and highlighted blonde for a good 15 years and I honestly don’t know if I’ll ever go back to my natural brunette color.  Blonde just suits me.

However, anyone who regularly colors their hair knows that the process can be expensive, time consuming and very harsh on your hair.  Thankfully, there are a few easy tips and products you can use to maintain bleached/dyed blonde hair and stretch out your money and time between trips to the salon:

  1. Stay near your natural color

This one kind of goes without saying, but, trying to go platinum blonde if you naturally have jet black hair is going to be a very long, very expensive, and probably physically painful process.  We’re talking about bleach here.  That shit does NOT play around and can sting like a thousand wasps are burrowing into your scalp.

curls

My natural color is a fairly light brown so I stick to a honey-colored blonde dye with a half-head of bleach (platinum) highlights thrown in every 3 or 4 months.  Every six weeks I have only the new growth (roots) touched up with the dye and that helps keep the rest of my hair from being colored/damaged more than it needs to be.  Which brings me to my next point…

  1. Condition. Deep condition.

aussie

Bleach and dye are incredibly drying and damaging to the hair. That’s just the way it goes.  You can help slow and repair that damage with weekly deep conditioning treatments.  My absolute favorite is the Aussie 3 Minute Miracle Deep Conditioners.  The bottle says to leave it on for three minutes but I’m a “Go big or go home” kind of person so I typically apply this conditioner post-shampoo, throw a raggedy shower cap over it (sexy!) and let it sit for an hour while I rot my brain with the latest episode of Real Housewives of NYC.

10

Another conditioning product I love and use religiously is the It’s a 10 Blonde Miracle Leave-In Treatment.  This leave-in smells great, protects your hair during heat styling, detangles, enhances shine and helps keep color treated blonde from turning orange and brassy.  This stuff is legit.

  1. Use a purple shampoo

Another ally in the fight against brassiness, purple shampoo helps balance the yellow tones in blonde hair to make them brighter.  John Freida makes a good purple shampoo but I’m cheap and buy the generic Clairol Shimmering Lights Shampoo online or from Sally’s.

purple
Photo credit: thethriftygirlsguide.com

As you can see, this shampoo is extremely purple so a little goes a long way.  If you use it too often or leave it on too long it can actually give your hair a purple tinge.  If that’s your thing, rock on.  If not, only use it once or twice a week.

  1. Don’t wash your hair so often

batiste
Photo credit: berenicebeauty.wordpress.com

This is a tip for really anyone but especially for us bleach blondes.  Unless you’re getting crazy sweaty, there’s no need to wash your hair daily.  Washing every day strips your scalp of its natural oils and when you’re dehydrating your hair with bleach and color, you need all the moisture you can get.  It may take your hair and scalp some time to get used to not being washed every day, but you hair will thank you once it adjusts.  Plus, color won’t fade as fast when you’re not stripping it with shampoo chemicals every day.  Get some dry shampoo (Batiste is my hands-down favorite) and learn to embrace the natural body and shine slightly dirty hair can give you.

Hope this helps all of my other faux-Marilyn Monroe’s out there!

Beauty Tips for When You’ve Been…Overserved

Well, isn’t this just the worst.  You, my friend, have been overserved.  You have a hangover.

Your mouth tastes like (and somehow has the texture of) an old rug soaked in beer.  Your head is bumpin’.  That jerk of a sun is up and you gotta be, too. You likely feel AND look terrible but you’re required to interact with other humans today and want to look less undead.  I’m no miracle worker, but here are some makeup and beauty tips to help lessen the damage:

  1. Shower
    For the love of God, shower. A good drinking session has the power to leave you waking up smelling like a rotting muskrat covered in Doritos so, wash up.  Bonus: The water will wake you up and make you feel better because it is a 100% proven fact that showers help ease the pain of hangovers (based on personal research).  Wash off any remaining makeup from the night before and get that blood pumpin’.
  1. Perfume/Cologne
    Perfume is needed because, well, see above. Now you don’t want to go overboard with this step because an overserved nose is highly susceptible to any smells which can increase the lovely nausea you’re trying to shake.  Stick with a clean, fresh, not too overpowering scent.  This is no time for anything flowery or musky.  We’re just trying to lessen the stank emanating from your body.
  2. Moisturize
    You may think this is the perfect time to just throw every makeup product you own on your face in an attempt to cover the half-dead corpse decaying within and call it a day.  You would be wrong. The first and most important thing you need to do is moisturize!Alcohol dries out the skin something fierce so slather moisturizer on your face (and body, if you can stand up that long) to plump up the skin.  The rubbing motions will get the blood flowing and also help drain the puffiness from under your eyes.

    For extra de-puff power, throw a couple spoons in the freezer for a few minutes.  Once they’re nice and cold, place the spoons over your eyes, lie down for 5 minutes and contemplate why you ever even attempt to drink tequila.

  1. Makeup
    You’re struggling to put sentences together so there’s no way you’re putting on a full face today. Thankfully, just a few products can make a big difference.Use a BB cream or tinted moisturizer as your base.  Don’t waste time with foundation or powder today, you need the hydration and smoothing benefits of a BB cream. Next, skip the eyeshadow.  Dark colors can weigh those tired eyes down even more and make you look worse, so stick to just a bit of eyeliner and lots of mascara to open up the eyes.  Finish up with a glossy or bright lip to fake a fresh-faced look.

    Pro Tip: Use a flesh-colored eyeliner on your lower waterline to cancel out the redness and make eyes look whiter, brighter and less, well, hungover.

  1. Hair
    Let’s be frank – your hair probably looks pretty horrific.  No worries!  Pull that hair up in a high ballerina-style bun.  This serves two crucial functions – you look polished and put together, plus you get a mini face lift. Win.

Now go forth and conquer this day!  (And by “conquer” I mean drag yourself out the door and begin counting down the seconds until you can reunite with your bed.)

Quick & Easy Makeup for Work

There are few things that can rival my love of makeup, but one thing that can is sleeping.  I’ve always been a world-champion sleeper and thoroughly enjoy sleeping in until the absolute last minute before it’s critical that I get up and start the day.

Like many people, I have to get up early in the morning to go to work.  How do I combine my true loves of sleeping and having enough time to put my makeup on?  Easy.  I keep my look simple, but impactful, and only focus on three things:

  1. Skin

A full face of foundation, contouring and powder? Ain’t nobody got time for that in the morning.  Instead, I use a flat top kabuki brush to apply Tarte Full Coverage Powder Foundation all over my face.  This foundation gives excellent coverage and helps control shine, no need for extra powder.  I’ll also quickly throw some Maybelline Fit Me concealer under my eyes to camouflage any darkness or puffiness, and I’m set.

  1. Eyes

If you can spare 1 minute, apply some light brown eyeshadow to your crease, but feel free to skip this if you want or are really pressed for time.  Instead, focus on your lashes and your brows.  Shaped and quickly filled-in brows make the face look “finished” (even if that face was just drooling onto a pillow 4 minutes ago).  A couple coats of mascara will help eyes look more open and awake.

  1. Lips

This is the key.  Wear a bright lipstick or balm.  My go-to color is red (in the photos below I’m wearing the Revlon Balm Stain in 045 Romantic) because I think it makes my teeth look crazy white, but a vivid pink also does the trick.  A bright lip pulls everything together, gives your face a pop of color and can distract from tired-looking eyes.

               red 1               red 2

(Confession: I have blush on, too)

This face takes 5 minutes max. It’s my go-to look on Monday mornings when I hit snooze once or thrice.  Plus, it’s appropriate for work, school….anything, really.  Hope you enjoy!

Skin Care 101: My Routine and Favorite Products

I have a confession.  Up until a couple years ago, I had no skin care routine whatsoever. Zero. Maybe I’d splash some water on my face in the morning and use whatever soap in the shower to do a mediocre job of washing off my makeup in the evening, but that was it.

I’m sure it comes as no surprise that my skin was dull with an uneven tone, fine lines were starting to form and, due to my naturally oily skin (thanks, Mom!), I had my share of acne.  Thankfully, I’ve learned a lot since then and now I actually get compliments on my skin, which still throws me off from time to time.  Take my advice and don’t wait 28 years to start caring for your face!

me
This is my face. And maybe a filter.

There are three basic steps to skin care: Cleansing, Exfoliating and Moisturizing.  Doesn’t sound too bad, right? Here is my current skin care routine and favorite products:

  1. Makeup Removal 

 1

I’m an evening shower person so we’ll start the routine with makeup removal. Removing all of your makeup before cleansing is a crucial step on the road to great skin. Before getting in the shower, I take off my makeup with a Neutrogena makeup remover wipe. The CVS brand of these wipes is great, too (and cheaper).  If I have some heavy-duty eye makeup on, I’ll soak a cotton ball with Neutrogena eye makeup remover and gently rub everything off.

  1. Cleansing and Exfoliating 

  2

I keep a rotation of several cleansers in the shower but usually mix together my all-time favorites of Cetaphil and the Garnier Blackhead Eliminating Scrub for Oily Skin.  Cetaphil is super mild and helps remove any remaining bits of makeup the wipe might have missed while the Garnier scrub removes dead skin and is gentle enough to use every day.  Plus, the charcoal in the scrub helps control acne and oily skin because, science.

3

Once or twice a week I’ll mix together a pump of Cetaphil with a small amount of my secret weapon: Skin Obsession Microdermabrasion Crystals.  These crystals are incredibly finely milled and a minute or two of rubbing this mixture all over your face will leave your skin baby soft and radiant.   Exfoliating is KEY in keeping skin soft, generating new skin cells and evening out skin tone. A smooth, even canvas gives you a fantastic base for applying makeup.  Exfoliating is also a necessity for keeping “mature” a.k.a over 30 skin, like mine, all glowy and youthful.

  1. Toning & Anti-Aging

4

Toner seems to be one of those things that people are on the fence about when it comes to skin care.  Do I think it’s a huge factor? No. Do I think it helps in my fight against oily skin? Yep. Once my skin is all cleansed, exfoliated and I’m out of the shower, I’ll soak a cotton ball in toner and wipe it all over my face.  Done.

Next it’s time for anti-aging. I’ve been using the Avene Retrinal 0.1 Cream ever since my dermatologist recommended it two years ago when I asked her what would help slow time from marching across my face.  The price is a little steep but you only need to use a pea-sized amount each night, so a tube will last months.  I apply this all over my face and neck. It has never made me break out, it doesn’t give that lovely sting that other retinol products can have and I think it’s done wonders for evening out my skin tone and plumping everything up a bit.  I highly recommend it.

While letting the Retrinal sink in and do its thing, I’ll apply a dot of Epiduo to any pimple that might be starting to show up and this stops it in its tracks.  I’m fairly certain that Epiduo is prescription only so ask your dermatologist for a sample.  It’s strong, effective stuff and can be very drying, so use a tiny dot only on the spot itself or you’ll risk the skin around it becoming dry and flaky.

  1. Moisturizing 

5

Anti-aging and acne prevention products can dry out the skin, so it’s time to put that moisture back in.  I like to use a combination of the classic Olay Night Cream with a few drops of Tarte Maracuja Oil mixed in. Yes, I have oily skin and yes, I put an oil on my face and I genuinely believe it’s one of the most important steps in my routine.  Maracuja oil has many benefits and is loaded with Vitamin C to give you a brighter, firmer complexion.  This oil is not cheap but when you only use 2-3 drops a day, it’s going to last.  I can’t say enough good things about it (although it smells a bit like french fry grease, but…who doesn’t love fries?).  For daytime moisture, I use the Olay Complete Moisturizer with SPF 15 after cleansing and before applying makeup.

Last, but certainly not least, I pat Olay Eye Lifting Serum underneath and around my eyes.

And that’s it!  This might sound like a ton of products and a lot of steps, but once I got into the habit, I got it down to a science and it only takes me 5-7 minutes, tops.

  1. Optional Step: Face Masks 

6

I don’t lead a particularly taxing life, but I still live by the “Treat Yo Self” motto.  Part of that treating is face masks.  I loooove them.  And you should, too, because they’re inexpensive, helpful for a range of skin issues and you’ll feel like a queen (or king, no judgement) waiting to be fed grapes while you lay around with your mask on.

Once or twice a week I’ll use one of the following masks, depending on what my skin’s doing or needing.  Bonus: All Freeman masks are inexpensive and sold at every drugstore:

  • Freeman Oatmeal & Avocado Clay Mask gets all the gunk out of your pores, leaving your skin extra clean and smooth. I like to use this mask at the end of the weekend since I’ve typically been wearing a lot of makeup and acting a fool for the past few days, so I need that deep clean.
  • Freeman Peel-Off Cucumber Mask is an old school, peel-off cucumber mask. Truthfully I just love this one for the Patrick Bateman-esque style of peeling the mask off once it’s all dry, but it does have actual skin smoothing and impurity-removing benefits.
  • Freeman Charcoal & Black Sugar Polishing Mask is a must for my fellow oily skin people because it contains our friend charcoal. This isn’t a mask exactly, but more a yummy-smelling paste.  Spread it all over your face, let it sit for a couple minutes, rub it all around your face for a minute or two, wash it off and voila! Glowing, smooth skin is yours.

My number one skin care tip? Be consistent. A solid routine and great products won’t help much if you’re only using them sporadically.  Carve out a couple minutes in your day to take care of your skin and I promise, your face will thank you for it.